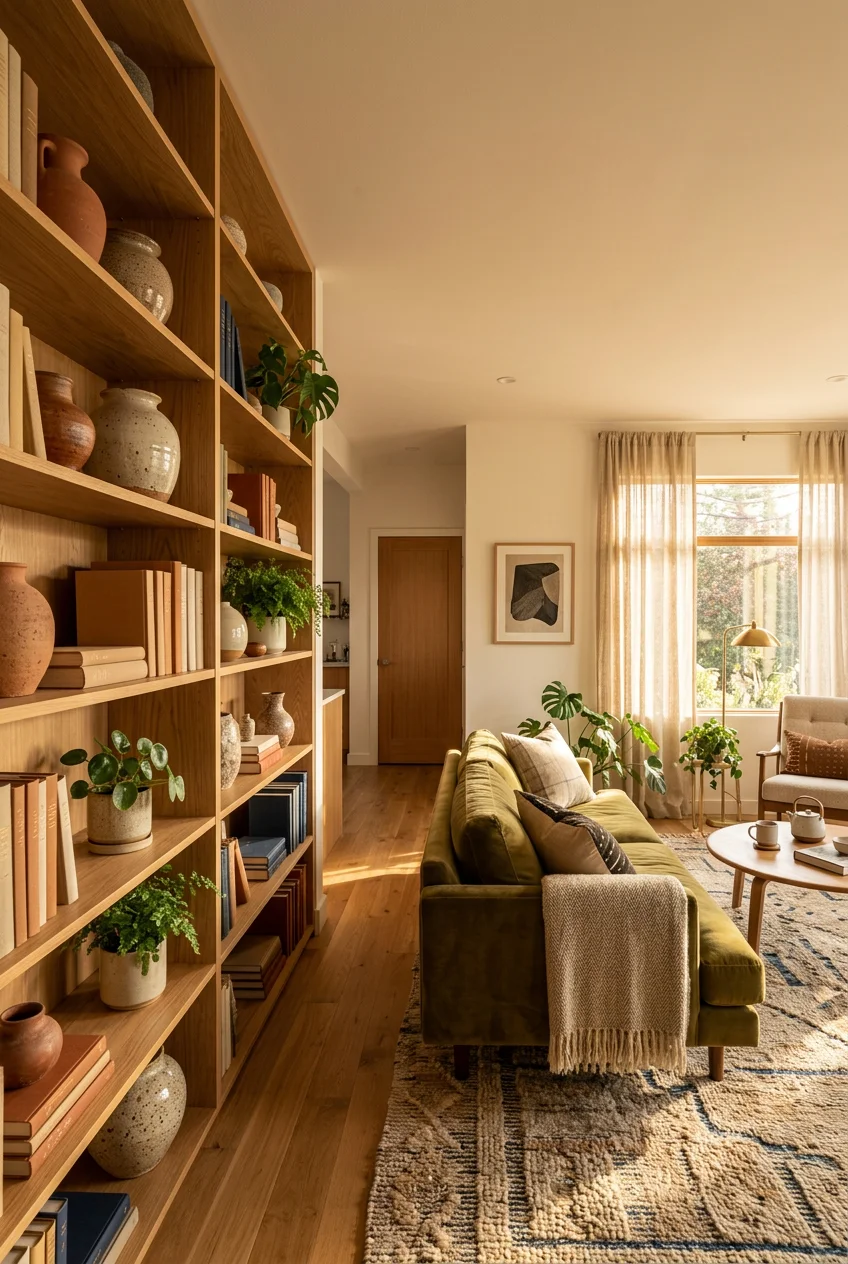
What’s Inside
- Master the Strategic Paint Refresh (DIY living room decor)
- Install Picture Frame Molding For Instant Architecture
- Upcycle A Thrifted Console With Chalk Paint
- Hang Curtains High And Wide To Fake Big Windows
- Anchor The Space With An Actually Correctly Sized Rug
- Float Your Furniture Layout For Better Conversation
- Curate A Gallery Wall That Tells Your Story
- Layer Your Lighting Beyond The Dreaded Overhead Fixture
- Build A Plant Shelf With Hidden Grow Lights
- Hide Smart Tech With A DIY Magic Mirror
- Mix Textures And Patterns For Balanced Maximalism
- Install Floating Shelves Using The Rule Of Thirds
- Craft Custom Throw Pillow Inserts That Won’t Flatten
- Upgrade A Basic Coffee Table With Peel-And-Stick Vinyl
- Frame An Oversized Floor Mirror For Cheap
- Style A Faux Mantel For Cozy DIY Living Room Decor
Last Thanksgiving, I stood in my living room and realized it looked like a sterile waiting room. I’d pinned hundreds of DIY living room decor ideas, but staring at my bare beige walls and a rug the size of a bath mat, I knew I’d failed. It was a disaster.
The space felt cold. I was buying random items from Trader Joe’s and Target, hoping they’d magically coordinate. They didn’t. You can’t just throw a $20 throw pillow at a bad layout and expect a magazine spread. I spent the next two years figuring out exactly how to fix it without gutting the house. I’m sharing the exact measurements, paint brands, and layouts that actually work. No vague advice here. Let’s fix your living room.
1. Master the Strategic Paint Refresh (DIY living room decor)

I tried painting my walls a moody green last year. I bought a tiny sample pot from Home Depot, painted a two-inch square directly on the drywall, and decided it was perfect. It wasn’t. Once I painted the whole wall, it looked like a swamp. Learned that the hard way. Experts advise against painting small swatches directly on the wall because the existing texture and color distort the new paint. Instead, paint a large piece of foam-core board. I buy a 5-foot board from Walmart for $4.98, apply two coats, and move it around the room for three days to see how the afternoon sun hits it. I use Benjamin Moore Aura paint for accent walls. It costs about $34 for a quart, but the stain resistance is unmatched. If you’ve got kids or dogs brushing against the walls, you need that durability. Behr Marquee is another solid option for one-coat coverage. I’d never go back to cheap paint. Just don’t skip the foam board step.
2. Install Picture Frame Molding For Instant Architecture

Blank drywall feels unfinished. Adding picture frame molding is the cheapest way to make a basic drywall box feel custom. This project adds real character to a flat space. I bought MDF casing from Woodgrain’s Timeless Craftsman collection. It measures 11/16 by 2 1/2 inches and costs about $0.79 a foot at my local lumber yard. For a standard 10×10-foot accent wall, the materials cost me exactly $82. I measure out my boxes with painter’s tape first. A common mistake is making the boxes too narrow. I keep mine at least 24 inches wide. Once it’s nailed up, you must caulk every single seam. Caulking is tedious and messy. My fingers were raw by the end of it. But once you paint the trim to match the wall, the shadow lines look incredibly high-end. If your walls aren’t perfectly smooth, use extra caulk to fill the gaps behind the wood.
3. Upcycle A Thrifted Console With Chalk Paint

I bought a heavy oak dresser from a thrift store for $45. It smelled like old dust and had terrible brass handles, but the bones were solid. Sanding down heavy varnish is a nightmare I refuse to relive, which is why I use Annie Sloan Chalk Paint. It requires almost zero prep work. A liter costs $42, which sounds steep, but I only used half a can for the entire dresser. I chose a matte charcoal gray. The real trick to making an upcycled piece look modern is replacing the hardware. I bought a 10-pack of matte black bar pulls from Target for $24.99. You must measure the center-to-center hole distance carefully. I bought 3-inch pulls for a 3.5-inch gap once and had to fill the holes with wood putty. It looked terrible. Get the measurement right the first time. The combination of the chalky, relaxed finish and the sleek modern hardware completely updates the piece.

Jexine 4 Pcs Hanging Planters with Artificial Eucalyptus
Honestly, Jexine 4 Pcs Hanging Planters with Artificial Eucalyptus Metal Hanging surprised me — sturdier than it looks in the photos, and over 12 buyers gave it 4.5 stars.
4. Hang Curtains High And Wide To Fake Big Windows

Most people get curtain hanging completely wrong. For years, I mounted my curtain rods directly on the window trim. It made my ceilings feel low and blocked half the natural light. You need to go high and wide. Install your curtain rod at least 12 inches (30cm) above the window frame. If your ceilings are low, mount the rod just two inches below the ceiling line. Then, extend the rod 7 to 14 inches past the window frame on each side. When the curtains are open, the inner edge of the fabric should just barely cover the window frame. This creates the illusion of a massive window. I use the IKEA RITVA curtains. They cost $39.99 for a pair and are 118 inches long. You must hem them, but the heavy cotton fabric looks like expensive custom linen. Ensure the fabric barely grazes the floor. Curtains that stop short look terrible.
5. Anchor The Space With An Actually Correctly Sized Rug

A postage-stamp-sized rug is the fastest way to make a room look cheap. I bought a 5×7 rug for my main seating area three years ago because it was on sale for $50. It floated awkwardly under the coffee table, and my sofa legs didn’t even touch it. The room looked entirely unbalanced. For an average-sized living room, the absolute smallest rug you should buy is 8×10. If you’ve got a larger space, you need a 9×12 or even a 10×14. At least the front legs of all your main furniture pieces must rest on the rug. This visually connects the seating area. I finally upgraded to a 9×12 chunky jute rug from Rugs USA for $289. The thick texture anchors the room perfectly. A properly sized rug makes the room feel intentional and grounded. I’ve used this specific rug for two years now, and it still looks brand new. You might also like: 20 Inspiring Cozy Home Decor Ideas You Haven’t Thought Of
6. Float Your Furniture Layout For Better Conversation

Pushing all your furniture against the walls is a terrible habit. I did this in my first apartment because I thought it would make the room feel bigger. Instead, it created a massive dead zone in the middle of the floor, and I had to shout across the room to talk to anyone. Stagers recommend pulling furniture away from the walls to create a U-shape or H-shape layout. I moved my sofa three feet away from the back wall and placed two accent chairs directly across from it, separated by an 18-inch gap for the coffee table. This creates a tight, inviting conversation zone. You want people to sit facing each other, not staring blankly at a television. If there’s space behind the sofa, add a slim console table. I built a 10-inch deep console table out of scrap wood to hide the back of my sofa. It completely changes the flow of the room. You might also like: 20 Cozy Apartment Decor You Need to See

3 Pack Metal Mirrors for Wall Sunburst Wall Mirrors Home
3 Pack Metal Mirrors for Wall Sunburst Wall Mirrors Home Décor Decorat punches above its price — 2 buyers rated it 4.5 stars. I would buy it again.
7. Curate A Gallery Wall That Tells Your Story

Generic mass-produced art lacks soul. A gallery wall should feature things you actually care about. I frame vintage postcards, fabric swatches, and black-and-white family photos. I buy thick, vintage-inspired frames from thrift stores, usually paying $3 to $5 each. I spray paint them a uniform matte black or leave the worn brass finish for a collected look. The middle of your gallery wall arrangement should sit exactly 60 inches from the floor. If you’re hanging it above a sofa, the bottom frame should be just 4 to 8 inches above the back of the sofa. Any higher, and it looks disconnected from the furniture. I lay all my frames out on the floor first. I cut pieces of newspaper to match the frame sizes and tape them to the wall with painter’s tape. It saves me from putting twenty unnecessary nail holes in my drywall. You might also like: 20 Apartment Bedroom Decor Worth Trying
8. Layer Your Lighting Beyond The Dreaded Overhead Fixture

Relying solely on your overhead ceiling fixture makes your living room look like an interrogation room. You need layered lighting. I refuse to turn on my overhead light after 7 PM. Instead, I use a mix of floor lamps, table lamps, and accent lights. I bought a sculptural arc floor lamp from Target for $80 that hangs over my reading chair. On my console table, I keep a small ceramic table lamp with a warm 2700K LED bulb. For ambient lighting, I installed the Govee Smart Neon Rope Light 2 behind my media console. It costs $69.99 and lets you adjust the color temperature from your phone. I keep it on a dim, warm amber setting. The soft glow eliminates harsh shadows and creates a moody, relaxed atmosphere. Avoid cheap, cool-toned daylight bulbs. They ruin the cozy vibe entirely. Always check the Kelvin rating on the box.
9. Build A Plant Shelf With Hidden Grow Lights

Indoor plants purify the air and soften hard architectural lines. I kill ferns constantly, so I stick to pothos and snake plants. They survive my neglect. I built a dedicated plant wall shelf using basic pine boards from Home Depot. To keep the plants thriving in a dark corner, I mounted Barrina T5 LED grow lights directly under each shelf. A pack of eight lights costs $45 on Amazon. They are ultra-slim and completely hidden from view. For planters, I repurpose large glass mason jars I buy in bulk from Costco for $14 a case. I paint the outside of the jars with leftover wall paint mixed with a tablespoon of baking soda to give them a textured, ceramic look. Overwatering will rot the roots quickly if you aren’t careful. This setup creates a lush, biophilic focal point without taking up floor space.

Ceramic Vase Set, Small Rustic Distressed Flower Vases in
If you want something that just works, Ceramic Vase Set is a safe bet.
10. Hide Smart Tech With A DIY Magic Mirror

I want the functionality of a smart home without the tech-bro visual. I built a smart mirror to hide my digital calendar. I used a Raspberry Pi computer, which costs about $35, and a cheap 24-inch computer monitor I found on Facebook Marketplace for $20. I built a simple wooden frame and placed a sheet of two-way mirror glass over the monitor. The glass cost $60 from a local glazier. When the screen is on, the white text shows through the mirror, displaying the time, weather, and my daily schedule. When it’s off, it just looks like a standard framed mirror. For the rest of my electronics, I use Kasa smart plugs. They cost $19.99 for a four-pack. I plug all my table lamps into them and control them via my phone. The technology disappears completely into the background.
11. Mix Textures And Patterns For Balanced Maximalism

A room full of smooth, shiny surfaces feels cold. You need to layer textures to make the space feel lived-in. I mix natural fiber rugs with heavy linen and organic cotton. I bought three washed linen pillow covers from H&M Home for $17.99 each. The fabric has a slight wrinkle to it that feels relaxed. I paired them with a heavy, woven wool throw blanket draped over the arm of my sofa. I was scared of patterns for a long time. I stuck to solid gray everything, and it’s incredibly boring. I finally introduced a rich botanical woven print on a small accent chair. I bought the fabric from Joann for $22 a yard and reupholstered the seat cushion myself. The key is varying the scale of the patterns. Mix a large floral print with a small, subtle stripe. If all the patterns are the same size, they compete visually and look chaotic.
12. Install Floating Shelves Using The Rule Of Thirds

Open shelving provides both storage and a design focal point. I use the IKEA LACK floating shelves. They cost $29.99 for the 43-inch version. You must anchor the metal bracket directly into the wall studs. I tried using drywall anchors once, and the shelf sagged under the weight of a few heavy books. Don’t risk it. When styling the shelves, avoid overcrowding. I apply the rule of thirds. Mentally divide the shelf into three sections. I leave one section completely empty to let the eye rest. In the second section, I stack three hardcover books horizontally and top them with a small brass object. In the third section, I place a tall vase or a trailing pothos plant. Varying the heights and leaving negative space prevents the shelves from looking like a cluttered storage unit.

3D Wooden Floral Bathroom Wall Decor (Set of 4) Lightweight
3D Wooden Floral Bathroom Wall Decor (Set of 4) Lightweight punches above its price — 634 buyers rated it 4.5 stars. I would buy it again.
13. Craft Custom Throw Pillow Inserts That Won’t Flatten

Flat, lumpy throw pillows make a sofa look sad. Most store-bought pillows come with cheap polyester inserts that flatten out after two months. I stopped buying new pillows and started making my own inserts. I buy heavy unbleached muslin fabric from Walmart for $3.96 a yard. I cut two squares, sew them together, and stuff them with Fairfield Poly-Fil. A 32-ounce box costs $16. Here is the secret: you must overstuff them. I pack the corners tightly until the insert is completely firm. Then, I put the insert into a pillow cover that is two inches smaller than the insert itself. If I use a 20×20 inch cover, I make a 22×22 inch insert. This creates a plump, luxurious pillow that holds its shape perfectly. I wash the covers in cold water and air dry them. Putting linen covers in the dryer shrinks them immediately.
14. Upgrade A Basic Coffee Table With Peel-And-Stick Vinyl

I owned a cheap, scratched laminate coffee table that I hated, but I couldn’t afford a solid marble slab. I decided to wrap the top in architectural vinyl. I bought a roll of d-c-fix marble contact paper on Amazon for $11.99. This isn’t a project you can rush. You need a plastic squeegee and a hair dryer. I peeled back two inches of the backing, stuck it to the edge of the table, and slowly smoothed it down while pulling the backing away. If you trap an air bubble, you must lift the vinyl and try again. Puncturing the bubble with a pin leaves a visible hole. The corners are the hardest part. I pull the vinyl tightly over the corner and trim the excess with a sharp utility knife. From three feet away, it looks exactly like real stone. No exaggeration.
15. Frame An Oversized Floor Mirror For Cheap

Large floor mirrors bounce light around the room and make tight spaces feel expansive. But a 6-foot mirror from a furniture store costs upwards of $400. I made my own for under $40. I bought a basic, frameless door mirror from Walmart for $7.14. Then, I went to Home Depot and bought four pieces of 1×4 common pine board for $8 each. I stained the wood with Minwax Special Walnut stain. I glued the mirror directly to a piece of cheap plywood using construction adhesive. Then, I nailed the stained pine boards over the edges of the mirror to create a thick, rustic frame. I leaned it against the wall in a dark corner of my living room, and it immediately doubled the light in that space. It’s heavy, so you must secure it to the wall with a safety strap.

Vanselia Ceramic Flower Vase Home Decor
Vanselia Ceramic Flower Vase Home Decor – Farmhouse Table Vases Rustic has been one of the most consistently praised picks in this category. 786 reviewers averaged 4.5/5.
16. Style A Faux Mantel For Cozy DIY Living Room Decor

You don’t need a working fireplace to have a mantel. I found a standalone wooden mantel on Facebook Marketplace for $40. It was painted a terrible glossy white, so I sanded it down to the raw wood. I secured it to the center of my longest living room wall using heavy-duty French cleats. Inside the empty firebox area, I stacked birch logs I bought from Whole Foods for $8.99 a bundle. I wove battery-operated fairy lights through the logs to create a warm glow in the evenings. On top of the mantel, I grouped five different heights of brass candlesticks I collected from antique stores. I use Kroger unscented pillar candles that cost $4.99 each. This faux fireplace anchors the room completely. It provides a focal point that isn’t a television, and the flickering light makes the space feel incredibly cozy during the winter.
You don’t need a massive budget or a contractor to change how your space feels. I spent years buying random decor pieces before I realized that scale, lighting, and layout matter far more than the price tag on a vase. It took me years to figure out. Start with the foam board paint trick or adjust your curtain height this weekend. Those small shifts change the entire geometry of the room. Save this post, pin the ideas you want to try, and tackle one project at a time. Your living room should be a place you actually want to sit in.
Frequently Asked Questions
What is the cheapest way to update my living room?
Paint is always the most cost-effective update. Painting a single accent wall with a high-quality paint like Benjamin Moore Aura costs under $40 and completely changes the room’s focal point.
How high should I hang my living room curtains?
Mount your curtain rod at least 12 inches above the window frame, or two inches below the ceiling line. Extend the rod 7 to 14 inches past the window sides to make the window appear larger.
What size rug do I need for a standard living room?
The absolute smallest rug for an average living room is 8×10 feet. Ensure at least the front legs of your sofa and accent chairs rest entirely on the rug to anchor the seating area.
How can I hide my TV cords and smart home tech?
Use smart plugs to hide lamp cords behind furniture, and consider building a DIY two-way mirror over a small monitor to display digital calendars without keeping an ugly plastic screen visible.
