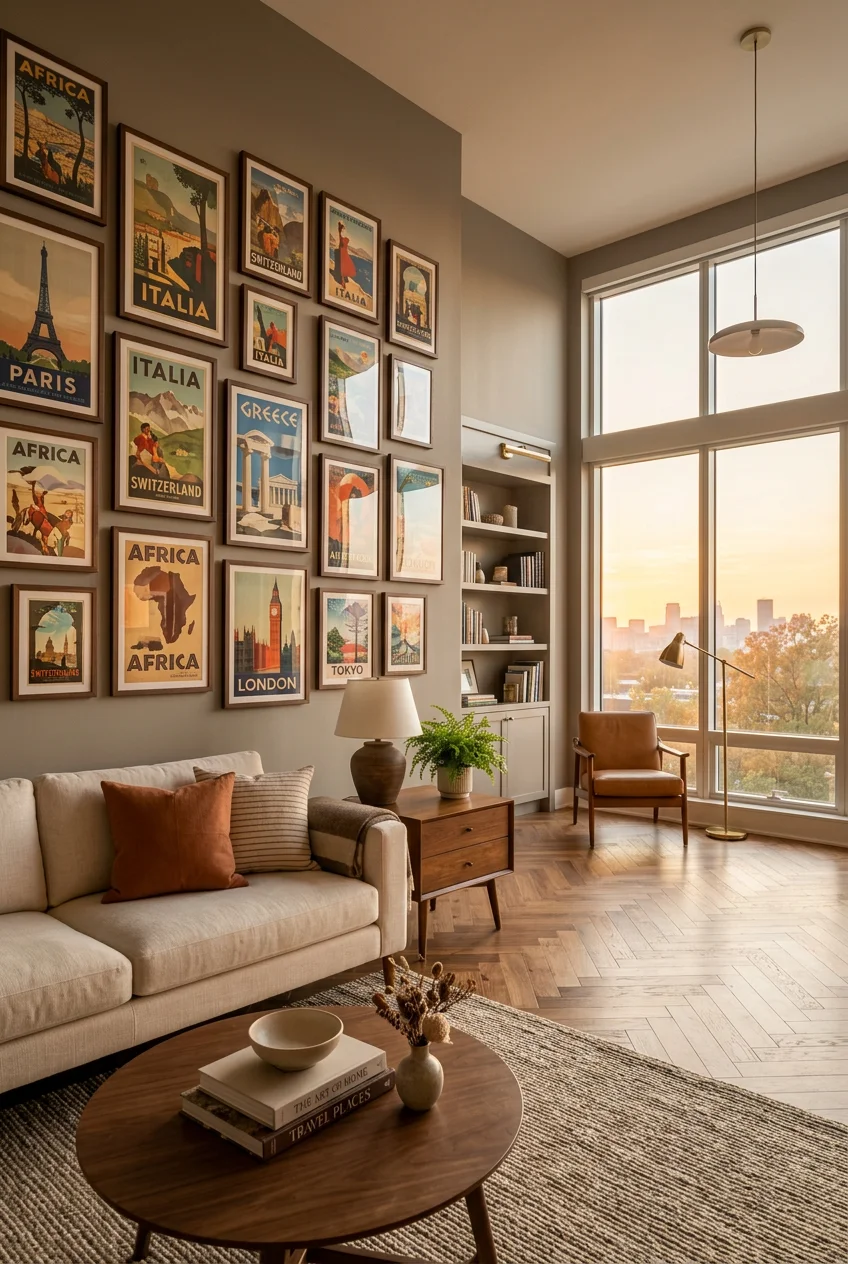
What’s Inside
- Invest in a Premium Scratch-Off Map for Interactive Tracking
- Curate Travel Wall Decor Ideas with Intentional Spacing
- Make a Statement with Large-Format Photography
- Display Cherished Souvenirs in Shadow Boxes
- Embrace Transportive Wall Murals
- Incorporate Sustainable and Ethically Sourced Decor
- Utilize Digital Photo Frames for Dynamic Displays
- Create a World Time Zone Clock Wall
- Avoid the Common Mistake of Over-Cluttering
- Anchor Your Gallery Wall with a Central Piece
- Incorporate Textured Wallpapers for Sensory Depth
- Rotate Your Souvenir Displays Seasonally
- Integrate Biophilic Design with Nature-Inspired Art
- Personalize with Custom Art and Quotes
- Find Travel Wall Decor Ideas in Unconventional Objects
I spent three hours last Tuesday staring at a pile of crooked frames on my living room floor. I realized my attempt at travel wall decor looked less like a gallery and more like a chaotic dorm room. I’d just returned from a trip to Oaxaca with beautiful artisan textiles, but taping them to the drywall wasn’t working. Skip the thumbtacks and cheap poster putty. That stuff ruins your walls and makes your expensive souvenirs look cheap. I did this wrong for months before figuring it out. After patching twelve unnecessary nail holes with spackle that didn’t match my paint, I finally learned how to structure a display. Let’s fix your blank walls with actual, methodical steps that look intentional and hold up over time.
1. Invest in a Premium Scratch-Off Map for Interactive Tracking

I tried a $10 paper scratch map from Target three years ago. I scratched too hard with a quarter and ripped a hole straight through Colorado. The paper curled at the edges within a week because of the humidity in my apartment. If you’re going to track your trips this way, get a durable, plastic-backed map. Brands like Wanderlust Maps or 1DEA.me Deluxe offer stylish options that actually survive the scratching process. These deluxe maps usually run from $40 to $80. The plastic backing means the map stays completely flat against the wall. No exaggeration.
Consider a large 24×36-inch Maps International Scratch Off USA Map for detailed cartography. If your apartment has limited wall space, the compact 12×17-inch JARLINK map fits perfectly above a small desk. Many of these premium options come with specific scratch tools, like small guitar picks. These tools allow for clean reveals of the vibrant colors underneath the gold foil without gouging the base layer. The 300gsm paper weight on the higher-end models prevents that annoying wrinkling effect when the weather changes. I’ve kept my current Wanderlust map pinned up for two years now, and the edges are still razor-straight.
2. Curate Travel Wall Decor Ideas with Intentional Spacing

Instead of a random assortment of every trip you’ve ever taken, choose a clear theme for your travel photo gallery wall. “Coastal Escapes” or “Cities I’ve Loved” creates a cohesive visual story. Interior stylists suggest editing more than you think you need to. You want to ensure enough breathing room between images. I learned this the hard way after trying to cram twenty photos onto a small hallway wall. It looked incredibly cluttered.
Lay out your photos and prints on the floor first. I prefer using a $5.99 roll of brown Kraft paper from Michaels. I trace the frames, cut out the paper templates, and tape them to the wall using ScotchBlue painter’s tape ($4.48 a roll). This lets you visualize the exact layout before hammering a single nail. You need to maintain exactly 2 to 3 inches of space between frames for a professional look. Anything less looks crowded. Anything more looks disconnected. I usually snack on a bag of Trader Joe’s peanut butter pretzels while shifting these paper templates around until the balance feels right. The 2-inch gap provides just enough negative space so your eyes can rest between the different frame textures.
3. Make a Statement with Large-Format Photography

Print a favorite travel memory as a large-format piece instead of relying on a dozen tiny 4×6 prints. Fine art photographers like Jess Lee and Andrew Prokos offer museum-quality prints in various formats. You can find options in Lumachrome HD TruLife Acrylic, Chromaluxe Metal, and Hahnemühle Fine Art Paper. The acrylic finish specifically eliminates the annoying glare you get from standard glass frames.
Sizes can range from a standard 30×40 inches from Artifact Uprising up to an impressive 60×120 inches for massive living room walls. Prices for paper prints start around $295. I ordered a 30×40 inch matte paper print of a foggy morning in Seattle last October. The matte finish hides fingerprints, which matters when I’m constantly moving things around to dust. The sheer size of a 40-inch print forces the room to center around that specific image. If you’re using a local print shop, specify that you want archival ink. Standard printer ink fades to a weird, sickly green color after a year of direct sunlight. The UV-resistant coating on the Hahnemühle paper costs about $40 extra, but it’s completely necessary if your room gets afternoon sun.

FAEKSUR Framed Abstract Neutral Wall Art for Living Room
Honestly, FAEKSUR Framed Abstract Neutral Wall Art for Living Room surprised me — sturdier than it looks in the photos, and over 1 buyers gave it 4.5 stars.
4. Display Cherished Souvenirs in Shadow Boxes

Turn small mementos like ticket stubs, foreign coins, postcards, or pressed flowers into curated displays using shadow boxes. Craft stores like Michaels offer various sizes, specifically the Belmont 8×8 inch frames for about $14.99. You can also create DIY shadow boxes for less than $3 using basic frames from dollar stores.
I tried using standard liquid school glue for my first shadow box. It completely warped my vintage train tickets from Paris. The moisture in the glue ruined the paper within hours. Skip the wet glue. Use scrapbooking paper for the background and secure your items with Glue Dots brand adhesive ($4.99 for a box of 200). The dry adhesive gives a clean finish and won’t damage delicate paper souvenirs.
A common mistake is filling the box completely to the edges. Ensure enough space so that every inch isn’t covered. Leaving a one-inch border of blank background paper around your items makes the display look intentional rather than like a junk drawer dumped into a frame. I keep a 10×10 inch shadow box on my entryway table filled with smooth sea glass from Maine, and the negative space makes the colors pop.
5. Embrace Transportive Wall Murals

For an immersive experience, consider a travel-themed wall mural. This is a significant design trend for 2026. The industry is moving beyond simple geometric patterns to transportive scenes that create a strong sense of place. Rebel Walls offers a variety of murals, from dusty desert scenes to moody city views. You can completely change the atmosphere of a room for about $5.50 per square foot.
I installed a muted forest mural in my guest bedroom last spring. The paste-the-wall application method means you roll the adhesive directly onto the drywall, not the paper. This prevents the heavy, wet paper from tearing in your hands while you’re standing on a ladder. The thick, non-woven material covers up minor wall imperfections effortlessly.
Don’t attempt this on heavily textured walls. I tried applying a similar mural over heavy orange-peel texture at my old apartment. The bumps showed right through the paper and ruined the illusion of the scenery. You need a smooth surface. If your walls have texture, you’ll need to skim-coat them with joint compound first, which costs about $20 for a bucket at Home Depot and takes a full weekend to dry and sand. You might also like: 19 Home Decor Ideas Living Room And Kitchen for Every Budget
6. Incorporate Sustainable and Ethically Sourced Decor

Reflect the 2026 trend towards sustainability by choosing decor from brands committed to ethical practices. Look for items made from recycled materials or sourced directly from local artisans. Brands like West Elm and The Citizenry offer home decor with Fair Trade certification and responsibly sourced materials. This supports global communities and reduces environmental impact.
I bought a handwoven alpaca wool wall hanging from The Citizenry for $135. The rough texture of the raw wool adds a tactile element that flat paper prints simply can’t provide. When you’re sourcing pieces while actually traveling, look for local cooperatives rather than airport gift shops. The mass-produced wooden masks at the airport are usually carved by machines thousands of miles away. You might also like: 20 Small Living Room Decor Ideas You Need to See
Authentic pieces carry the distinct smell of the materials. My woven piece still faintly smells of natural lanolin and woodsmoke from the dyeing process. To hang heavy textiles, skip the standard nails. I use a 36-inch wooden dowel from Walmart ($2.97) and suspend it with thick leather cord. It distributes the weight evenly so the fabric won’t sag in the middle over time. You might also like: 18 Living Room Decor Indian Worth Trying

3 Pack Metal Mirrors for Wall Sunburst Wall Mirrors Home
3 Pack Metal Mirrors for Wall Sunburst Wall Mirrors Home Décor Decorat punches above its price — 2 buyers rated it 4.5 stars. I would buy it again.
7. Utilize Digital Photo Frames for Dynamic Displays

Keep your travel memories fresh and rotating with a high-resolution digital photo frame. The Aura Aspen features an 11.8-inch screen with a crisp 1600×1200 resolution for around $230. Another solid option is the Skylight Frame, offering a 10-inch screen at 1280×800 resolution for about $140.
I bought the Aura frame during a Costco run last November. The matte screen finish is crucial because it mimics the look of printed paper and completely eliminates the harsh glare of a standard tablet screen. Many of these frames offer Wi-Fi connectivity and app control. The email-to-frame feature makes it incredibly easy for family and friends to share photos directly to my living room while they’re still on vacation.
The biggest drawback is the power cord. You can’t just hang these anywhere. I initially tried mounting mine in the middle of a hallway, but the thick black power cord dangling down the wall looked terrible. You need to position these frames on a console table or a shelf directly above an outlet. I use a $12 cord concealer kit from Target, painted to match my wall color, to hide the wire completely.
8. Create a World Time Zone Clock Wall

For a functional and travel-inspired display, install multiple clocks set to different time zones of your favorite past or future destinations. Etsy offers excellent custom time zone clock options with personalized city names. Brands like Airportag specialize in aviation and travel-themed wall clocks that look like vintage flight instruments.
JackandFriends.com offers LED lighted wall clocks at 14×14 inches featuring specific city skylines. I bought three of these for $45 each. I set them to New York, London, and Tokyo. The LED backlight doubles as a soft nightlight in my hallway.
If you’re buying analog clocks, check the movement mechanism before purchasing. I once bought four cheap plastic clocks from a discount store. The loud ticking sound echoed down the hallway and drove me crazy while I was trying to sleep. Look specifically for clocks labeled with a silent sweep movement. The second hand glides smoothly without making any noise. You’ll also need a laser level (like the $19 Black+Decker one from Walmart) to ensure the clocks align perfectly horizontally. Even a quarter-inch difference in height becomes glaringly obvious when hanging identical circular objects in a row.
9. Avoid the Common Mistake of Over-Cluttering

A frequent error is trying to display too many items at once. This leads to a display that feels chaotic rather than curated. As interior design expert Lisa Blount advises for gallery walls, you must edit more than you think you need to. Maintaining a professional look requires discipline.
I recently returned five black frames to Walmart because my gallery wall was simply too heavy visually. I’d tried to cram 25 different vacation snaps onto a single six-foot wall section. The visual noise was overwhelming. When you group too many small, detailed photos together, the eye doesn’t know where to focus. The entire wall just blurs into a messy collage.
For shadow boxes and shelves, ensure enough empty space remains. The negative space is just as important as the art itself. If you’ve fifty amazing photos from a trip to Italy, don’t hang them all. Pick the best three. Put the rest in a high-quality physical photo album on your coffee table. Let the wall decor breathe. A single, well-framed 8×10 inch photo commands much more attention than a scattered grid of twenty 4×6 inch prints competing for dominance.

Dorlicecass Irregular Wall Mirror
Dorlicecass Irregular Wall Mirror – Wall Mirrors Decorative 22″x 36″ A has been one of the most consistently praised picks in this category. 188 reviewers averaged 4.5/5.
10. Anchor Your Gallery Wall with a Central Piece

When designing a gallery wall, use one larger, impactful piece as an anchor. This gives the entire display an intentional and cohesive feel. This anchor could be a 16×20 inch framed print of a significant travel photo or a detailed vintage map of a specific region.
I use a heavy, brass-framed vintage map of the London Underground as my anchor piece. I found the frame in the Room Essentials aisle at Target for $15, though I upgraded the glass at a local framing shop. You position this large piece slightly off-center, and then arrange your smaller 5×7 and 8×10 photos around it.
Without a central anchor, a gallery wall often looks like a floating cloud of random rectangles. The anchor grounds the arrangement. I always hang the anchor piece first, ensuring the center of the frame sits exactly 57 inches from the floor. This is standard museum height. I’ve found that hanging art too high is the most common mistake people make. If you have to tilt your chin up to look at your travel photos, you’ve hung them too high.
11. Incorporate Textured Wallpapers for Sensory Depth

Beyond visual appeal, 2026 interior design trends highlight the importance of tactile textures in wall decor. Consider wallpapers like grasscloth, linen, or even velvet to add depth and warmth to your travel-inspired space. Rachel Cope of Calico Wallpaper notes a growing desire for surfaces that feel grounded, tactile, and deeply personal.
I spent an hour at Sprouts grabbing groceries while agonizing over grasscloth swatches on my phone. I eventually ordered a natural sisal grasscloth for an accent wall. The texture completely changed the acoustics of the room, absorbing echoes and making the space feel incredibly cozy. Real grasscloth has a distinct, earthy smell when you first unroll it, slightly sweet like dried hay.
Don’t use real grasscloth in a bathroom or a humid environment. I learned this when a client tried to put expensive linen wallpaper near a shower. The moisture caused the natural fibers to expand and peel away from the backing within a month. Keep these natural, textured wallpapers in dry spaces like living rooms or bedrooms. The visible seams are part of the charm. Don’t expect a perfectly seamless look with natural woven materials.
12. Rotate Your Souvenir Displays Seasonally

If you’re an avid traveler with a large collection, avoid static displays by regularly rotating your souvenirs. This keeps your decor fresh and allows you to enjoy different memories throughout the year.
I keep my off-season travel decor in clear, 15-quart plastic latching bins from Target ($9 each). In the winter, I display moody, black-and-white photos of snowy cabins and heavy wool textiles from Iceland. Come June, I pack those away and swap in bright, saturated canvas prints of Mediterranean beaches and lightweight linen wall hangings.
This rotation prevents sun damage. Leaving a delicate watercolor painting or a printed bus ticket in direct sunlight for twelve months straight guarantees it’ll fade. By rotating the pieces every few months, you extend the life of your fragile mementos. Store the items not currently on display safely in acid-free tissue paper to maintain their condition. The plastic bins protect against dust and silverfish. I once left a stack of unframed prints in a cardboard box in the attic, and the humidity warped the paper completely. Stick to airtight plastic storage.

3D Wooden Floral Bathroom Wall Decor (Set of 4) Lightweight
A dependable everyday pick — 3D Wooden Floral Bathroom Wall Decor (Set of 4) Lightweight pulls in 634 ratings at 4.5 stars. Not flashy, just solid.
13. Integrate Biophilic Design with Nature-Inspired Art

A strong trend for 2026 is biophilic design. This concept focuses on bringing the calming effects of nature indoors. Incorporate canvas prints of travel scenery, dense forests, rolling oceans, or rugged mountains. Pair these visual elements with natural materials like raw wood and stone in your surrounding decor to enhance the outdoor-inspired aesthetic.
I grabbed a bundle of dried eucalyptus from the floral section at Whole Foods last week to hang next to a canvas print of the Redwood forest. The physical presence of the dried leaves bridges the gap between the two-dimensional art and the three-dimensional room. The eucalyptus also adds a sharp, clean scent to the space.
I frame my nature prints exclusively in raw, unfinished oak. The light wood grain complements the earthy tones in the photography. Avoid high-gloss plastic or polished chrome frames for nature prints. The shiny synthetic materials clash terribly with the organic subject matter. I made that mistake by putting a beautiful matte photograph of a desert canyon into a glossy black plastic frame from a discount bin. The cheap frame completely overpowered the subtle, dusty colors of the photograph.
14. Personalize with Custom Art and Quotes

Move beyond generic, mass-produced art by creating custom canvas prints of your own travel photos. You can also frame specific travel quotes that resonate with you or use typography prints to add a highly personal touch to your gallery wall. This approach ensures your wall decor tells your unique story rather than looking like a doctor’s waiting room.
I use CanvasPop to print my iPhone photos. A 16×20 inch stretched canvas costs around $80. The texture of the canvas hides the slight pixelation that happens when you blow up a smartphone photo to a large size.
Don’t use generic quotes like “Live, Laugh, Love” or basic “Wanderlust” scripts. I printed the exact GPS coordinates of the tiny cafe in Rome where I drank the best espresso of my life. I used a crisp, sans-serif font and framed it in a simple black metal frame. It looks like modern, minimalist art to guests, but holds a specific memory for me. I print these typography pieces at home on heavy 110lb cardstock from Staples ($16 a ream). Standard printer paper looks wavy and cheap behind glass.
15. Find Travel Wall Decor Ideas in Unconventional Objects

Sometimes the best travel wall decor ideas aren’t photos or maps at all. Think about the physical objects you interacted with during your trip. Restaurant menus, vintage matchbooks, or even local currency can become striking art pieces when handled correctly.
I framed a set of colorful, intricately patterned ceramic tiles I bought at a market in Lisbon. The tiles cost maybe $4 each. I used a heavy-duty construction adhesive to mount them to a piece of half-inch plywood, then built a simple wooden frame around the edge. The entire piece weighs about fifteen pounds, so I had to use heavy-duty drywall anchors rated for 50 pounds (the metal screw-in kind from Home Depot, $7 for a pack).
Don’t rely on standard picture wire for heavy, unconventional objects. I tried hanging a carved wooden paddle from Hawaii using a basic wire kit, and the wire snapped in the middle of the night. The paddle gouged my baseboard when it fell. Use D-ring hangers screwed directly into the back of the object, and hang them on heavy-duty screws driven straight into a wall stud. The thud of that paddle hitting the floor taught me never to underestimate the weight of solid wood or ceramic decor. Trust me on this.
Getting your travel memories onto the wall doesn’t have to end in crooked frames and damaged drywall. Whether you’re mounting a massive scratch-off map or carefully spacing out a structured gallery wall, the secret is simply taking your time and using the right materials. I’d highly suggest starting with a roll of Kraft paper to map out your layout before you ever pick up a hammer. It saves so much frustration. If these tips helped you figure out your blank walls, pin this article to your home decor board for your next weekend project.
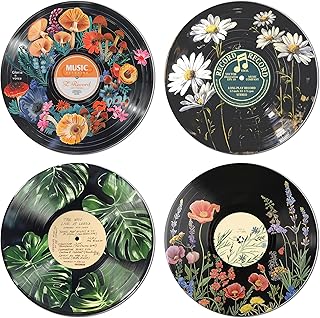
HK Studio Hippie Decor, Posters for Room Aesthetic
If you want something that just works, HK Studio Hippie Decor is a safe bet (348 reviews, 4.5 stars).
Frequently Asked Questions
How do you display travel souvenirs on a wall?
Use shadow boxes for small items like tickets, coins, or pressed flowers. Secure them with dry adhesive dots on scrapbooking paper, leaving a one-inch border of negative space so the display looks intentional rather than cluttered.
What is the best way to hang heavy travel decor?
Skip basic picture wire. For heavy items like ceramic tiles or wooden carvings, use D-ring hangers screwed directly into the object’s back, and mount them on heavy-duty drywall anchors or screws driven straight into a wall stud.
How much space should be between gallery wall frames?
Maintain exactly 2 to 3 inches of space between frames. This provides enough breathing room for the eye to rest. Use Kraft paper templates and painter’s tape to plan your layout before hammering any nails.
Do digital photo frames look tacky on a wall?
Not if you buy the right kind. Choose a frame with a matte screen finish, like the Aura Aspen, which mimics printed paper and eliminates harsh glare. Always use a painted cord concealer kit to hide the power wire.
