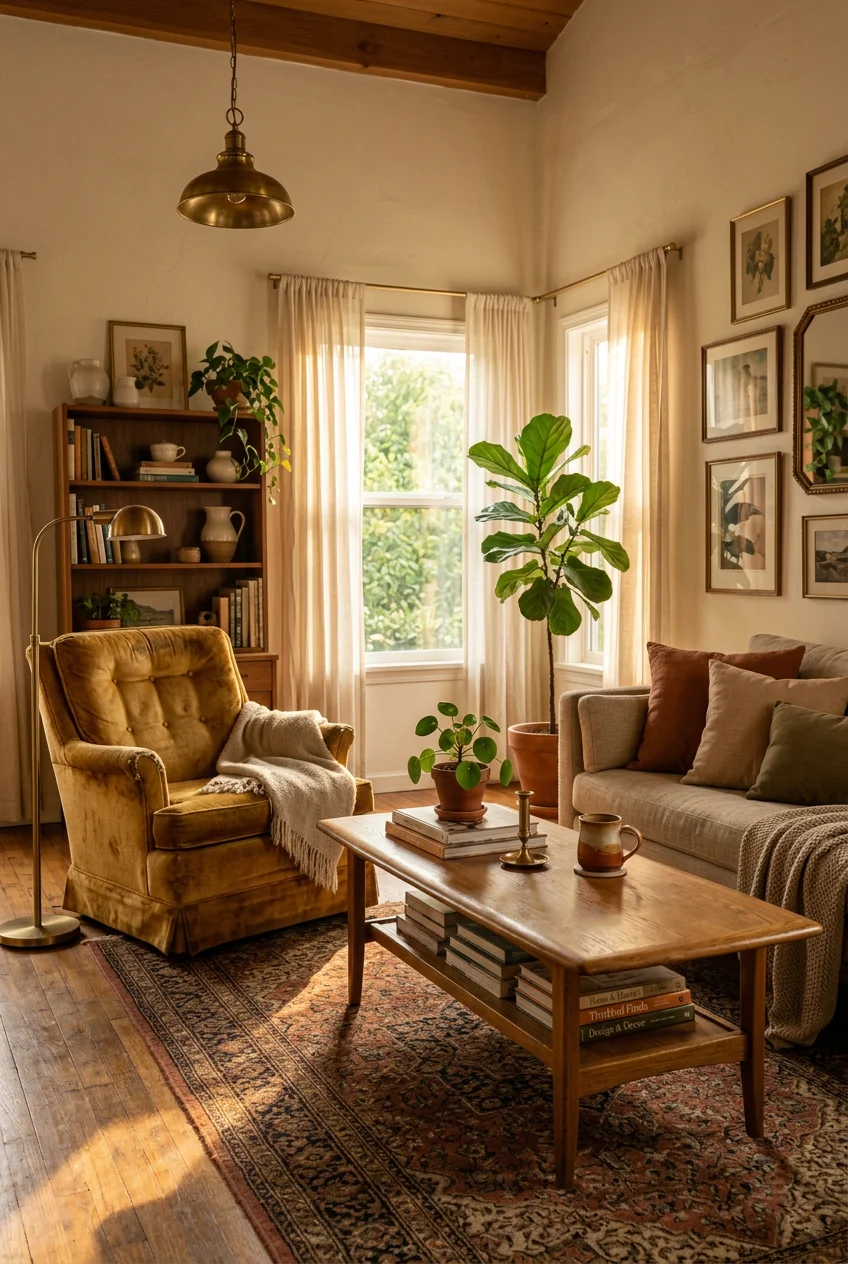
What’s Inside
- Update Dated Furniture with Chalk Paint for a Modern Matte Finish
- Revitalize Wooden Pieces with a Rich Stain and Protective Topcoat
- Reupholster Small Seating for a Custom Look
- Create Textured Vases with Paint and Baking Soda (A Cheap Thrifted Home Decor DIY Idea)
- Curate a Cohesive Gallery Wall with Unified Thrifted Frames
- Upgrade Thrifted Lamps with a Rewire Kit and Custom Shade
- Craft Unique Throw Pillows from Vintage Textiles
- Style Bookshelves with Curated Thrifted Objects and Books
- Give Plain Mirrors an Ornate Upgrade
- Organize with Upcycled Baskets and Wooden Boxes
- Create Faux Aged Pottery from Cheap Glassware
- Restore Tarnished Brass Hardware Naturally
- Build Large-Scale Pinboards from Ornate Frames
- Paint Faux Tile Trays for Coffee Tables
- Create Pressed Botanical Art in Thrifted Frames
Last October, I ruined a perfectly good mid-century nightstand. I tried stripping it with harsh chemicals in my poorly ventilated garage, ended up with a massive headache, and the wood turned a sickly, irreversible orange. That disaster forced me to rethink my entire approach to thrifted home decor DIY. If you’re tired of spending your weekends on projects that look like a messy Pinterest fail, I completely get it. I’ve spent the last three years testing what works, what fails, and what materials are actually worth buying when reviving second-hand finds. You don’t need a professional workshop to make used items look high-end, but you do need the right techniques. Let’s look at fifteen actual thrifted home decor DIY ideas that won’t make your living room look like a college dorm. I’m sharing the exact products, prices, and mistakes I made so you don’t have to repeat them.
1. Update Dated Furniture with Chalk Paint for a Modern Matte Finish

I learned the hard way that you can’t just slap paint over fifty years of furniture polish and expect it to stick. Last Tuesday at the Habitat for Humanity ReStore, I found a solid wood side table for $25. The shape was beautiful, but the glossy cherry finish was hideous. The biggest mistake people make here is skipping the prep work. If you skip cleaning, the paint just peels off in rubbery strips a week later. You need a heavy-duty degreaser like a TSP substitute first. The sharp, chemical smell isn’t fun, but it strips the grease instantly. Took me years to figure that out. Once it’s clean and dry, I use Rust-Oleum Chalked Paint. A 30 oz can costs about $18 at Walmart, and it goes a long way. I applied two thin coats of their Farmhouse White shade. The matte finish hides minor scratches in the wood perfectly. You won’t get that plastic sheen that cheap latex paint leaves behind. Always finish with a clear wax or a polycrylic topcoat, otherwise, the dry texture holds onto every single fingerprint and speck of dust in your house.
2. Revitalize Wooden Pieces with a Rich Stain and Protective Topcoat

Stripping wood is messy, but the payoff is worth the sticky hands. I picked up a low-profile coffee table for $40 at Goodwill last month. The old varnish was flaking off in yellowed chunks, exposing the raw pine underneath. I spent three hours sanding it down in my driveway, starting with 120-grit sandpaper to remove the stubborn topcoat, then smoothing it out with 220-grit. Fine pine dust coated my entire driveway and my clothes. Sarah Miller, a furniture refinishing expert I follow, always says you have to sand with the grain to prevent nasty, cross-hatch scratches that show through the stain. She’s right. I applied one coat of Varathane Wood Stain in Early American. A quart runs about $15 at Home Depot. The warm tone brought out the natural wood grain beautifully without looking orange. But stain alone won’t protect your table from wet coffee mugs. I sealed it with three thin coats of Minwax Polycrylic Protective Finish, which costs around $20 per quart. It smells terrible while drying, so open a window. The final result looks like a high-end boutique piece.
3. Reupholster Small Seating for a Custom Look

Reupholstering an entire sofa is a nightmare I won’t attempt again, but small dining chairs or ottomans are totally manageable. I found a pair of vanity stools at Savers for $15 each. The wood was fine, but the fabric smelled faintly of stale cigarette smoke and cheap floral perfume. I immediately ripped the old fabric off in my driveway with a flathead screwdriver. For the new cover, I bought one and a half yards of a heavy cream boucle from Joann Fabrics. It was on sale for $18 a yard. The heavy, nubby texture of the boucle feels soft but hides dirt well. You need a serious tool for this part. I use the Arrow T50 heavy-duty staple gun, which you can grab for about $30 at Target. The most common mistake here is not pulling the fabric tight enough. If you leave it loose, the fabric sags after a week. You have to pull it taut across the cushion, starting in the center of each side and working your way to the corners. The textured fabric completely hides the staples underneath.

Farmhouse White Fake Decorative Books for Home Office Decor
If you want something that just works, Farmhouse White Fake Decorative Books for Home Office Decor – Religion is a safe bet (10 reviews, 4.5 stars).
4. Create Textured Vases with Paint and Baking Soda (A Cheap Thrifted Home Decor DIY Idea)

This is one of my favorite DIY ideas because it costs almost nothing and takes twenty minutes. Thrift stores are overflowing with ugly, shiny glass vases from old floral deliveries. You can usually buy them for $3 to $5. To fix the shiny glass problem, mix exactly 1 tablespoon of regular baking soda into a 1/2 cup of matte acrylic paint. I usually use FolkArt Home Decor Chalk Paint, which is about $5 a bottle at Walmart. The baking soda reacts with the paint to create a thick, gritty paste. The brush drags a bit as you apply it because of the grit, but that’s exactly what you want. I brush two heavy coats onto the glass, letting it dry completely between layers. The finish dries into a rough, matte texture that mimics expensive handmade pottery. I tried this wrong for months before figuring it out. I used to put way too much baking soda in, and the paint would crumble right off the glass in dusty chunks. Stick to the ratio. I keep one of these textured vases on my kitchen island, filled with fresh eucalyptus I grab during my weekly grocery run at Trader Joe’s. You might also like: 20 Cozy Apartment Decor You Need to See
5. Curate a Cohesive Gallery Wall with Unified Thrifted Frames

Buying new picture frames is shockingly expensive. A single large frame can easily cost $40 at a craft store. Instead, I hunt for solid wood frames at the Salvation Army. I don’t care what color they are, I just look for interesting shapes and uncracked glass. I usually pay between $2 and $8 per frame. To make a chaotic, mismatched collection look intentional, I spray paint them all the exact same color. Rust-Oleum Painter’s Touch 2X Ultra Cover Spray Paint is my go-to. It costs about $6 a can at Lowe’s. The sharp hiss of the spray can and the chemical smell mean this is strictly an outdoor project. A matte black finish instantly modernizes ornate, dated frames. If I want a vintage gold look, I skip the spray paint and rub on some Rub ‘n Buff metallic wax finish. A tiny $9 tube lasts forever. Just apply it with a soft cloth and buff it out. Interior designer Emily Henderson suggests laying out your arrangement on the floor first to visualize the spacing. I do this every single time, otherwise, I end up with extra, ugly holes in my drywall. Trust me on this. You might also like: 20 Small Living Room Decor Ideas You Need to See
6. Upgrade Thrifted Lamps with a Rewire Kit and Custom Shade

Vintage lamp bases are gorgeous, but their sixty-year-old wiring is a massive fire hazard. I found a heavy brass table lamp at a garage sale for $10. The base was incredibly heavy, cold metal, but the cord was frayed and covered in sticky yellow electrical tape. I refused to plug it in. Rewiring a lamp sounds intimidating, but it’s actually a ten-minute job. I bought a Westinghouse Lamp Rewire Kit for $12 at Home Depot. The instructions are clear, even if you aren’t handy. You literally just unscrew the old socket, thread the new wire through the base, and tighten two screws. For the shade, the original was stained and smelled like dust. I bought a cheap plastic drum shade and recovered it using half a yard of natural linen I ordered from Fabric.com for $14. Using spray adhesive, I wrapped the linen tightly around the drum, folding the raw edges inside. The combination of the heavy, aged brass base with the crisp, natural linen shade completely updates the piece. It sits on my desk now and looks custom. You might also like: 20 Cozy Wall Decor Ideas for Every Budget

UTTCMK Bookshelf Decor Thinker Statue
A dependable everyday pick — UTTCMK Bookshelf Decor Thinker Statue – Abstract Art Reading Thinker S pulls in 809 ratings at 4.5 stars. Not flashy, just solid.
7. Craft Unique Throw Pillows from Vintage Textiles

The textile aisle at a thrift store is a goldmine if you know what to look for and aren’t afraid of a little sewing. Last month, I found a heavy, woven wool blanket with a beautiful geometric pattern for $8. The edges were badly frayed, but the center was pristine. The raw wool was stiff and scratchy before the wash. The absolute first step is washing the fabric. I’ve made the mistake of cutting into unwashed thrifted blankets before, and the stale smell lingers in your living room for weeks. Wash it in hot water with a cup of white vinegar. Once it’s clean and dry, I cut the fabric to fit standard pillow inserts. I always use the IKEA FJÄDRAR feather inserts. They cost about $8 each and give pillows that heavy, expensive “chop” look that stiff polyester fill just won’t do. Leave a 1/2-inch seam allowance on all sides. I sew a simple envelope closure on the back using a matching heavy-duty thread. The thick wool adds incredible texture to my smooth leather sofa, making the whole room feel warmer.
8. Style Bookshelves with Curated Thrifted Objects and Books

Empty bookshelves look sad, but filling them with brand new decor items costs a small fortune. I source almost all my shelf styling pieces second-hand. Hardback books are usually $1 to $3 at thrift stores. I look for books with interesting textured covers and completely ignore the titles. The first thing I do is rip off the glossy, chaotic dust jackets. The satisfying crackle of ripping the glossy paper off reveals beautiful linen or matte paper covers in solid colors underneath. I stack them horizontally to act as pedestals for small decorative objects. I hunt for heavy ceramic bowls, brass figurines, or carved wood pieces, usually spending under $5 per item. Home stager Jane Smith advises grouping items in odd numbers, like threes or fives, to create visual interest. It’s a simple rule, but it works perfectly. I’ll place a stack of three blue books next to a single brass candlestick and a small trailing pothos plant. I bought the pothos during a grocery run at Whole Foods. The mix of paper, metal, and living plants makes the shelves look curated over time.
9. Give Plain Mirrors an Ornate Upgrade

Builder-grade mirrors are boring and make a room feel unfinished. I had a plain rectangular mirror sitting in my hallway for two years before I finally decided to fix it. I went to Lowe’s and bought an 8-foot piece of decorative wood trim molding for $12. I measured the mirror frame and cut the trim to fit the inner edge. I attached the trim directly to the existing flat frame using a strong wood glue and a few tiny brad nails to hold it in place while it dried. The sweet, sharp smell of wood glue filled the hallway. The corners didn’t line up perfectly, which happens when your walls aren’t entirely straight. I patched the gaps with Elmer’s Wood Filler, which costs about $6. Once the filler dried hard, I sanded the corners smooth. To unify the cheap original frame and the new decorative trim, I painted the whole thing. I used a $5 sample pot of Behr Premium Plus Interior Paint in a deep, moody forest green. The added molding gives the mirror a thick, chunky profile. It completely changes the entryway for under $25.

CEMABT Glass Vases for Flowers,Thickened 3.4 lb Morden
CEMABT Glass Vases for Flowers,Thickened 3.4 lb Morden vases for Table has been one of the most consistently praised picks in this category. 13 reviewers averaged 4.5/5.
10. Organize with Upcycled Baskets and Wooden Boxes

I refuse to buy plastic storage bins for my living spaces. They look cheap, collect static dust, and crack easily. Instead, I constantly look for sturdy wicker baskets and wooden crates at thrift stores. You can usually find them for $3 to $10. Wicker baskets just need a good scrub with warm soapy water and a stiff brush to remove dust from the crevices. You’ll hear the dry, brittle snapping sound of old wicker as you clean it, but it holds up fine. Wooden boxes are more fun to customize. I found an old wooden clementine crate that was structurally sound but covered in ugly stamped logos. I sanded the outside lightly to remove the rough splinters. Then, I lined the inside with a leftover scrap of floral cotton fabric. I used Mod Podge Fabric, which is about $9 at Joann Fabrics. You just brush a thick layer of the glue onto the wood, press the fabric down smoothly to push out any air bubbles, and let it dry. It creates a hard, durable lining. I use that crate to hold extra toilet paper in my guest bathroom.
11. Create Faux Aged Pottery from Cheap Glassware

If the baking soda trick isn’t giving you enough heavy texture, joint compound is the next step up. I bought a massive, ugly red glass jug for $6 at a local charity shop. The shape was stunning, like an antique olive oil vessel, but the shiny red glass was awful. I bought a small tub of pre-mixed drywall joint compound for $10 at Home Depot. Using a plastic putty knife, I smeared a thin, messy layer of the compound all over the glass. The joint compound feels like cold, heavy mud on the plastic knife. You don’t want it to be smooth. The messy ridges and bumps are what make it look like ancient clay. I let it dry overnight until it was chalky white and rock hard. Then, I painted over it with a mix of beige and taupe acrylic paints, dabbing the colors on with a damp sea sponge rather than brushing them. This creates a mottled, aged effect. I sealed it with a matte spray clear coat. I keep it on my dining table now, and it looks incredibly heavy and authentic.
12. Restore Tarnished Brass Hardware Naturally

Finding a vintage dresser with its original brass hardware is a massive win, but the handles are usually black with decades of tarnish and skin oils. One of the best DIY ideas involves restoring that metal without ruining the vintage patina. I bought a mid-century credenza for $60, and the handles were completely crusted over. I used to use Brasso, which is about $4 at Walmart, but the intense chemical smell gives me an instant migraine. Plus, it leaves the brass looking too shiny and cheap. Now, I use a natural soak. I mix one cup of white vinegar with one tablespoon of regular table salt in a glass bowl. I drop the hardware in and let it sit for an hour. You can actually see the vinegar and salt mixture fizz slightly as it eats the tarnish. The acid cuts through the black grime, but it leaves a soft, aged warmth to the metal. I take them out, scrub them lightly with an old toothbrush, rinse them in warm water, and dry them immediately with a microfiber cloth. If you don’t dry them right away, water spots will permanently etch into the brass.

Lvases Snuggle Hollow Ceramic Vase Set of 2
Honestly, Lvases Snuggle Hollow Ceramic Vase Set of 2 surprised me — sturdier than it looks in the photos, and over 18 buyers gave it 4.5 stars.
13. Build Large-Scale Pinboards from Ornate Frames

I needed a massive bulletin board for my home office, but the ones at office supply stores are flimsy, ugly, and overpriced. I went to Goodwill and found an enormous, gaudy gold plastic picture frame for $15. The painting inside was ruined, but the frame itself was sturdy. I threw away the canvas and the glass. I bought a roll of thick cork liner from Amazon for $15, and a piece of foam core board from the craft aisle at Target for $5. I cut the foam core to fit the exact dimensions of the frame opening. Then, I used 3M Super 77 Spray Adhesive (about $12 at Home Depot) to glue the cork roll flat onto the foam core. You have to work quickly with spray adhesive, or it dries into useless sticky clumps. If the overspray hits your fingers, you’re picking sticky rubber off your hands for days. I wrapped the whole cork board tightly in a piece of raw canvas fabric, stapling it to the back of the foam core. Finally, I secured the padded board into the vintage frame using glazing points. It’s a huge, custom pinboard.
14. Paint Faux Tile Trays for Coffee Tables

Wooden serving trays are useful, but plain wood can look a bit dull sitting directly on top of a wooden coffee table. I found a sturdy tray with handles for $4 at a garage sale last summer. The wood was scratched and stained with dark, sticky coffee rings. I sanded it down quickly and painted the flat interior base with two coats of crisp white chalk paint. Once that dried, I bought a geometric tile stencil for $10 online. Using a dense foam roller, I rolled a deep navy blue paint over the stencil. The trick here is using almost no paint on the roller. If the roller is wet, the paint bleeds under the plastic stencil and ruins the crisp lines. I learned that the hard way on my first try and had to sand the whole tray down and start over. Once the stenciled pattern was perfectly dry, I sealed the bottom of the tray with three heavy coats of Minwax Polycrylic. The final tray feels perfectly smooth and cold to the touch. You need that thick topcoat so you can wipe up spilled drinks without ruining the paint.
15. Create Pressed Botanical Art in Thrifted Frames

Art is the hardest thing to buy on a tight budget. I love the look of delicate pressed botanicals, but framed sets online sell for hundreds of dollars. I decided to make my own. I bought six identical simple wood frames from a thrift store for $2 each. I took out the terrible stock photos and cleaned the glass with vinegar. Then, I went foraging in my own backyard and snipped ferns, delicate weed flowers, and thin leaves. I placed the fresh cuttings between two sheets of parchment paper and shoved them inside the heaviest books I own. I stacked a 20-pound dumbbell on top of the books and left them alone for three weeks. When I opened the books, the leaves were paper-thin and perfectly dried. The dried ferns are so brittle they crackle if you press too hard. I mounted them onto high-quality, textured watercolor paper. A pad of good watercolor paper costs about $12 at Joann Fabrics. I used tiny dabs of clear craft glue to hold the fragile stems in place, then popped them into the frames. They look incredibly delicate and expensive. No exaggeration.
There you go. You don’t need a massive budget to make your house look incredible, you just need a little patience and a willingness to get your hands dirty. I genuinely hope these ideas save you from the expensive, frustrating mistakes I made when I first started out. If you’re planning a weekend project soon, pin this post so you don’t forget the exact paint and stain colors I mentioned. Let me know which one you’re trying first!

Lazebox Coasters Set of 8 for Drinks
A dependable everyday pick — Lazebox Coasters Set of 8 for Drinks pulls in 17 ratings at 4.5 stars. Not flashy, just solid.
Frequently Asked Questions
What kind of paint is best for thrifted wood furniture?
I always use a high-quality chalk paint, like Rust-Oleum Chalked Paint, for thrifted wood. It requires less sanding than latex, adheres beautifully to older pieces if properly degreased, and dries to a modern, matte finish that hides minor imperfections perfectly.
How do you get the thrift store smell out of vintage textiles?
Never use vintage fabrics without washing them first. I wash thrifted blankets and curtains in hot water with your regular detergent and one full cup of white vinegar. The vinegar strips out the stale odors and breaks down old fabric softeners.
Is it safe to rewire a vintage thrifted lamp?
Yes, it’s completely safe and surprisingly easy if you use a brand new, UL-listed rewire kit. Kits from hardware stores cost around $10-$15 and include the fresh cord, plug, and socket. Just follow the included instructions to replace the old, brittle wiring.
How do I make cheap glass vases look like expensive pottery?
Mix one tablespoon of standard baking soda into a half cup of matte acrylic or chalk paint. Brush two thick coats onto the glass. The baking soda creates a gritty, stone-like texture that mimics the look of high-end, handmade ceramic pottery.
