What’s Inside
- Ditch Cool Gray for Earthy Tones in Your Wall Decor Painting Ideas
- Invest in Premium Paint for Heavy Traffic Areas
- The Mandatory Prep Work Nobody Wants to Do
- Primer is Never Optional for Drastic Color Changes
- Sharp Geometric Patterns Require the Right Tape
- Master the Two-Tone Ombre Effect
- Moody Accent Walls Need Warm Lighting
- Color Washing for Subtle Wall Decor Painting Ideas
- Limewash Paint for an Authentic Old-World Feel
- Painted Arches to Frame Your Furniture
- Stenciling That Doesn’t Look Like the 1990s
- Half-Wall Painted Wainscoting
- Don’t Ignore the Ceiling as the Fifth Wall
- Faux Concrete Texture with Joint Compound
- Painted Checkerboard Patterns for Floors or Walls
- Sponging is Back, But Keep the Contrast Low
- Painted Faux Molding for Flat Walls
- Strategic Chalkboard Paint in the Kitchen
- High Gloss Trim for Unexpected Contrast
Last October, I ruined my living room wall trying to freehand a mural with cheap craft paint. It looked like a toddler smeared mud across the plaster. When I started looking for painting ideas to fix my mess, I realized most online advice skips the actual hard parts. Let’s skip the Pinterest fails and talk about what really works. I’ve been there. I’m sharing the exact paints, tools, and techniques I use to fix my own mistakes.
1. Ditch Cool Gray for Earthy Tones in Your Wall Decor Painting Ideas

Cool grays are dead. I painted my home office a sterile gray back in 2019, and it felt like working inside a walk-in freezer. I spent six months shivering before I repainted. Now, I lean heavily into warm, nature-inspired neutrals. Valspar’s Warm Eucalyptus is an earthy gray-green that costs $45.98 for a gallon at Lowe’s. It completely changes the temperature of a room. You get a grounded, calming vibe without the clinical undertones of blue-gray. If you’re picking up paint, grab a 2-inch Purdy angled brush for $14.97 to cut in around your baseboards. The bristles hold just enough paint to keep a straight line without dripping. I actually finalized this color choice while standing in line at Whole Foods, staring at a display of dried eucalyptus branches and realizing that was the exact muted green my walls needed. It’s subtle, but the warmth makes your space feel lived-in rather than staged. Took me years to figure out that lighting changes everything, so test your swatches first.
2. Invest in Premium Paint for Heavy Traffic Areas

Buying cheap paint is the most expensive mistake you can make. I bought a $20 gallon of bargain interior paint from Walmart three years ago for my hallway. Within two months, the wall had scuff marks that won’t wipe off without taking the paint down to the drywall. I ended up spending double the time and money to fix it. You’re better off buying Sherwin-Williams Emerald Interior Acrylic Latex Paint. Yes, it costs $70.69 per gallon during their seasonal sales, but the durability pays for itself. The formula has a built-in resistance to water streaking and spotting. I’ve wiped tomato sauce off my kitchen wall with a wet rag, and the finish stayed completely matte. When you’re rolling this on, use a 3/8-inch nap roller cover, which runs $6.48 for a 3-pack. The thicker nap holds the heavy acrylic formula better and prevents those annoying roller marks that show up when the afternoon sun hits your wall.
3. The Mandatory Prep Work Nobody Wants to Do

Before you open a single paint can, you have to clean your walls. I skipped this step in my first apartment and painted straight over a wall that had five years of invisible cooking grease on it. The new paint peeled off in sheets like a bad sunburn. You need a bucket of warm water and 2 tablespoons of TSP substitute, which costs $7.48 for a 32 oz bottle at Home Depot. Scrub the walls down with a large yellow sponge. Once it’s dry, fill every single nail hole with DAP DryDex spackling. A small 8 oz tub is $8.98 and goes on pink, then dries white so you know when it’s safe to sand. Use a 120-grit sanding block ($4.97) to smooth the patches. It leaves a fine white dust everywhere, so keep a shop vac handy. This prep takes a full afternoon, but your paint won’t adhere properly without a clean, smooth surface. Learned that the hard way.

VIYYIEA Vintage Gold Framed Wall Art
VIYYIEA Vintage Gold Framed Wall Art punches above its price — 437 buyers rated it 4.5 stars. I would buy it again.
4. Primer is Never Optional for Drastic Color Changes

I tried painting a pale cream over a dark burgundy dining room wall last spring. I thought a paint-and-primer-in-one would save me time. Six coats later, the red was still bleeding through, and the wall looked like a bruised plum. You must use a dedicated primer when transitioning from dark to light. Benjamin Moore Fresh Start primer costs about $24.99 for a quart or $65 for a gallon. It smells strongly of ammonia, so open your windows wide. Roll on one solid coat of this white primer using a 1/2-inch nap roller. It blocks the old color completely and gives your new topcoat something to grip. You’ll use half as much of your expensive topcoat paint because the primer stops the drywall from absorbing the moisture. Let the primer dry for a full 24 hours. If it feels slightly tacky to the touch, it needs more time before you apply your final color.
5. Sharp Geometric Patterns Require the Right Tape

If you want to create bold triangles or stripes, standard masking tape won’t work. I tried using cheap beige masking tape for a striped wall in my guest room, and the paint bled under every single edge. It took me three hours with a tiny artist brush to touch up the jagged lines. You need FrogTape Multi-Surface painter’s tape. A 1.41-inch roll costs $9.48, and the edges are treated with a polymer that reacts with latex paint to form a micro-barrier. Press the tape down firmly with a plastic putty knife ($2.98) to seal the edge. For the actual shapes, you don’t need gallons of paint. Buy Benjamin Moore color samples, which start around $5.94 for a half-pint. I used three different sample pots of mustard yellow, navy, and terracotta to fill in a geometric mural behind my desk. Peel the tape off while the paint is still slightly wet. If you wait until it dries completely, the tape might rip your fresh paint right off the wall.
6. Master the Two-Tone Ombre Effect

Blending two colors on a single wall creates a soft, gradient look, but it requires speed. I attempted an ombre wall using Sherwin-Williams Universal Khaki (SW 6150) and a basic white ceiling paint. My mistake was doing it on a hot July afternoon. The paint dried before I could blend the middle section, leaving a harsh, ugly line across my bedroom. To do this correctly, buy a cheap plastic spray bottle ($1.99 at Target) and fill it with water. Roll your dark color on the bottom half of the wall and your light color on the top half. While both are still wet, mist the middle line heavily with water. Use a wide 4-inch dry brush ($12.48) to sweep back and forth across the wet middle, blurring the two shades together. You have to work in 3-foot vertical sections so the paint stays workable. It takes patience and a lot of wrist movement, but the final soft fade is visually stunning. You might also like: 20 Inspiring Cozy Home Decor Ideas You Haven’t Thought Of

3D Wooden Floral Bathroom Wall Decor (Set of 4) Lightweight
Honestly, 3D Wooden Floral Bathroom Wall Decor (Set of 4) Lightweight surprised me — sturdier than it looks in the photos, and over 634 buyers gave it 4.5 stars.
7. Moody Accent Walls Need Warm Lighting

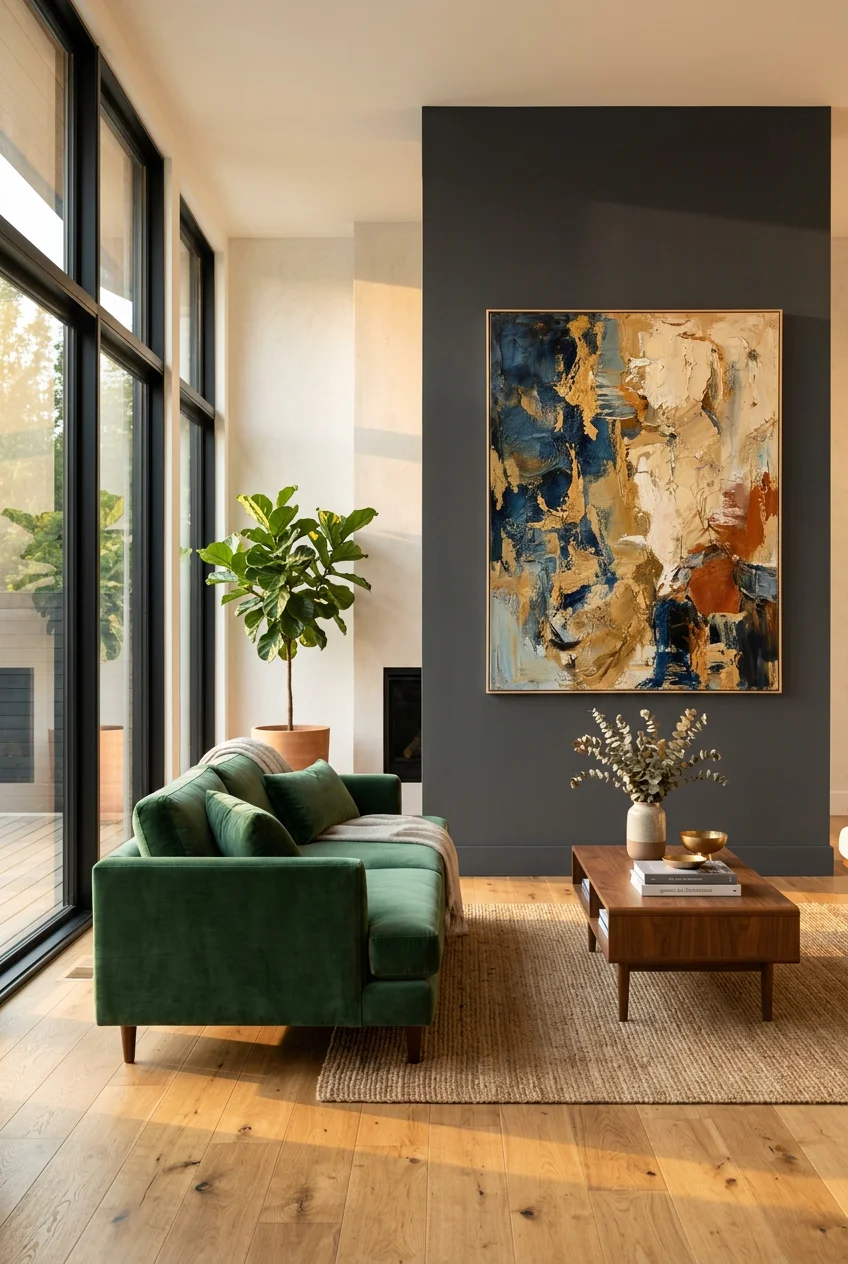
Dark walls can easily make a room feel like a cave if you aren’t careful. I painted my living room accent wall with Behr’s Hidden Gem, a deep smoky jade blue-green that costs $34.98 for a gallon. The color is rich and velvety, but the first night I sat in there, the room felt incredibly oppressive. The problem wasn’t the paint. It was the harsh overhead LED lighting. Dark paint absorbs light instead of reflecting it. I fixed the cave effect by adding two brass wall sconces ($45 each from Target) with warm 2700K amber bulbs. The warm light bounces off the dark jade paint, highlighting the green undertones instead of letting it read as flat black. If you’re going dark, you also need to use a flat or matte finish. A glossy finish on a dark wall shows every single drywall imperfection and roller mark. A flat finish hides the bumps and gives you that deep, saturated look. You might also like: 20 Small Living Room Decor Ideas You Need to See
8. Color Washing for Subtle Wall Decor Painting Ideas

Color washing gives your walls a mottled, plaster-like texture without the mess of actual plaster. You mix one part latex paint with four parts clear glaze. Valspar Antiquing Glaze costs $16.98 for a quart at Lowe’s. I used a damp natural sea sponge ($8.99) to dab the glaze mixture over a solid base coat. The first time I tried this, I used too much glaze, and it dripped down the wall into sticky brown puddles on my baseboards. You have to wring the sponge out until it’s barely damp. Work in small irregular circles, blending the edges softly. The glaze extends the drying time of the paint, giving you about 20 minutes to push the color around before it sets. I actually bought my sponges at Sprouts in their natural bath aisle because they were cheaper than the hardware store versions. The finished wall looks like aged Italian stucco, adding visual depth to a flat room. You might also like: 20 Creative Modern Home Decor Ideas for a Fresh New Look
9. Limewash Paint for an Authentic Old-World Feel

Limewash is entirely different from standard latex paint. It’s made from crushed limestone and water. I ordered a gallon of Portola Paints Limewash for $85. When you open the can, it looks like watery mud and smells faintly of chalk. You apply it with a massive 5-inch block brush ($24) using sweeping, overlapping strokes. Do not use a roller. A roller will ruin the textured effect. The scariest part of limewash is the drying process. When I brushed it on my dining room wall, the color looked five shades darker than the swatch. I panicked and almost washed it off. But as it dries over 12 hours, it lightens dramatically and develops a beautiful, chalky, cloudy finish. It creates a breathable, matte surface that feels slightly rough to the touch. Just know that limewash is hard to touch up later. If you scuff it, you usually have to repaint the entire wall section to blend the repair.

EZlifego Double Sided Tape Heavy Duty(Extra Large 16.5FT)
EZlifego Double Sided Tape Heavy Duty(Extra Large 16.5FT) punches above its price — 1,286 buyers rated it 4.5 stars. I would buy it again.
10. Painted Arches to Frame Your Furniture

Painting an arch directly onto the wall is a cheap way to highlight a specific piece of furniture. I created a terracotta arch behind a $120 wooden bookshelf in my hallway. You need a simple DIY compass: a thumbtack, a piece of string, and a pencil. Tie the string to the pencil, pin the other end to the center of your wall, and draw a perfect half-circle. I used a $14 sample pot of Farrow & Ball’s Sulking Room Pink. The hardest part is cutting in the curved line. I tried using painter’s tape by ripping it into tiny pieces to follow the curve, but the edge looked jagged. Instead, use a high-quality 1-inch angled artist brush ($7.50 at Michaels) and a steady hand. Paint slowly along the pencil line, then fill in the center with a mini 4-inch foam roller ($5.98). The painted arch acts like a visual anchor, making a basic bookshelf look like a built-in architectural feature.
11. Stenciling That Doesn’t Look Like the 1990s

Wall stencils have come a long way since the trailing ivy borders of the 90s. I bought a large geometric floor stencil from Cutting Edge Stencils for $39.95 to use on my laundry room wall. The secret to stenciling is using almost zero paint. The first time I loaded my foam roller, I pressed too hard, and the black paint squished under the plastic stencil. It left fat, blurry blobs instead of crisp lines. I had to paint over the whole wall and start again. Pour 2 tablespoons of paint onto a paper plate. Roll your dense foam roller ($4.97) into the paint, then roll it firmly on a paper towel until the roller feels almost dry. Secure the stencil to the wall with low-tack blue tape. Roll lightly over the cutouts. It takes three light passes to build up the color, but the edges stay perfectly sharp. Clean the back of the stencil with a baby wipe every three placements to prevent accidental smudges.
12. Half-Wall Painted Wainscoting

Installing real wood wainscoting costs hundreds of dollars in materials. I faked the look in my bathroom using paint and a single piece of trim. Measure 36 inches up from the floor and draw a level line across the room. Paint the bottom half a dark, grounding color. I used Benjamin Moore’s Silhouette AF-655, a deep charcoal-plum that costs $75 a gallon. Paint the top half a crisp white. To hide the wobbly paint line between the two colors, nail a simple pine chair rail molding ($12 per 8-foot piece at Lowe’s) directly over the seam. Paint the molding to match the dark bottom half. I actually picked up the molding while doing a massive weekend supply run at Costco and Home Depot. The dark bottom anchors the room and hides scuff marks from my dog, while the white top keeps the small bathroom feeling airy. It takes a Saturday to finish and costs less than $100.

KHOYIME Large Macrame Wall Hanging Boho Woven Tapestry
Honestly, KHOYIME Large Macrame Wall Hanging Boho Woven Tapestry surprised me — sturdier than it looks in the photos, and over 994 buyers gave it 4.5 stars.
13. Don’t Ignore the Ceiling as the Fifth Wall

Most people leave their ceilings builder-grade white. Painting your ceiling a soft color pulls a room together. I painted my bedroom ceiling a pale blush pink using Glidden Premium flat ceiling paint ($24.98/gallon). It reflects a warm, flattering glow over the whole room. However, painting a ceiling is physically miserable. Your neck will ache, and paint will splatter on your face. You need an extension pole ($14.98) for your roller frame. Do not load the roller with too much paint, or it won’t stop raining down on you. I’d recommend wearing safety goggles ($4.97) and a baseball cap. Roll the paint in straight lines parallel to your main light source to hide the roller lap marks. The flat finish is crucial here. Any sheen on the ceiling will highlight the drywall seams and nail pops. The blush pink ceiling completely changed the mood of my bedroom, making it feel cozy and enclosed rather than stark.
14. Faux Concrete Texture with Joint Compound

You can create a brutalist concrete wall using standard drywall joint compound. A 3.5-gallon bucket of USG joint compound costs $16.48 at Home Depot. I scooped globs of the thick white paste onto a 10-inch metal taping trowel ($11.98) and smeared it roughly over my bare drywall. You want it to be uneven, leaving ridges and flat spots. Let the mud dry completely for 24 hours. It will shrink and crack slightly, which adds to the concrete look. Once dry, I painted over the texture with a medium gray latex paint. While the gray paint was still wet, I lightly dragged a damp rag over the raised ridges to wipe away some color, exposing the lighter compound underneath. It creates an incredibly realistic concrete texture. The downside is the dust. If you ever decide to sand this flat in the future, you’ll need a heavy-duty respirator and a week to clean the fine white powder out of your house.
15. Painted Checkerboard Patterns for Floors or Walls

A painted checkerboard pattern is a classic, but the taping process is a nightmare. I used the Rust-Oleum Home Floor Coating kit ($44.98) to paint a black and white checkerboard on my enclosed porch floor. I measured out 12×12 inch squares using a framing square ($9.98). Taping off the alternating squares took me four solid hours. You have to paint all the white squares first, let them dry for 12 hours, re-tape the grid, and then paint the black squares. My biggest mistake was buying cheap tape from a discount bin at Kroger while picking up groceries. The cheap tape left a sticky residue on the white squares that I had to scrub off with rubbing alcohol. Spend the extra money on premium yellow FrogTape for delicate surfaces ($11.48). The finished checkerboard looks like expensive custom tile, but you pay for it with intense, tedious labor on your knees.

Artisan Set of 4 Silver Beveled Wall Decor Mirrors
Artisan Set of 4 Silver Beveled Wall Decor Mirrors – 24×8 Inch Each punches above its price — 214 buyers rated it 4.5 stars. I would buy it again.
16. Sponging is Back, But Keep the Contrast Low

Sponge painting is trending again, but the modern version uses low-contrast colors. Do not use dark blue over bright yellow unless you want your room to look like a 1990s diner. I used two shades of warm beige that were only one step apart on the paint swatch card. I bought a natural sea sponge for $8.99 at Ace Hardware. Dip the sponge lightly into the lighter beige paint, blot off the excess on a piece of cardboard, and press it gently onto the darker beige wall. Rotate your wrist 45 degrees after every single dab so you don’t create a repeating stamp pattern. I tried doing this without rotating my wrist, and a section of my hallway looked like an accidental grid of identical sponge marks. The low-contrast colors blend together from a distance, giving the wall a soft, suede-like appearance. It’s an easy way to hide bumpy, imperfect drywall without skimming the whole room.
17. Painted Faux Molding for Flat Walls

If you live in a basic apartment with flat, boring walls, you can paint fake picture frame molding. This is a trompe l’oeil technique that creates a 3D illusion. I mapped out three large rectangles on my living room wall using a 4-foot level ($19.98). Instead of nailing up wood trim, I used a 1-inch angled Wooster brush ($6.48) to paint a 1-inch thick border in a slightly darker shade than the wall color. Then, I added a thin, 1/4-inch line of bright white paint along the inside top and left edges to mimic a highlight, and a thin line of dark gray along the bottom and right edges to mimic a shadow. It requires intense concentration and a very steady hand. I had to touch up my wobbly lines repeatedly. From a few feet away, it genuinely looks like raised paneling. It costs about $15 in sample paints and adds instant architectural interest to a plain boxy room.
18. Strategic Chalkboard Paint in the Kitchen

Chalkboard paint is highly functional, but you shouldn’t paint a whole room with it. I painted a 3-foot wide section of my kitchen wall with Rust-Oleum Chalkboard Paint, which costs $17.98 for a quart. It takes three coats to build up a solid, writable surface. Before you write on it, you must season the wall by rubbing a piece of white chalk sideways over the entire surface and erasing it. If you skip this, the first word you write will be permanently burned into the paint. I use this wall constantly for grocery lists before running to Trader Joe’s. The major negative is the chalk dust. It settles on the baseboards and the floor directly beneath the wall. You have to wipe the baseboard with a damp cloth every time you erase a large list. Keep the chalkboard area small and away from your food prep stations to avoid getting chalk dust in your cooking. No exaggeration.
19. High Gloss Trim for Unexpected Contrast

Most people use semi-gloss for trim, but switching to a high gloss enamel creates a stunning contrast against flat wall paint. I painted my bedroom doors and baseboards with Behr Premium Cabinet & Trim Enamel in a high gloss black ($44.98/gallon). The glossy black reflects light beautifully and makes the flat green walls pop. However, high gloss paint is notoriously difficult to apply. It shows every single brush stroke, dust particle, and wood grain imperfection. I didn’t sand my baseboards enough the first time, and the gloss highlighted every dent and scratch like a magnifying glass. You must sand the wood perfectly smooth with 220-grit sandpaper ($5.48) and wipe away all dust with a tack cloth ($3.98) before painting. Use a high-quality nylon/polyester brush and apply thin coats. Don’t over-brush it. Lay the paint off once and leave it alone to self-level. The glassy finish is worth the annoying prep work.
I’ve ruined enough walls to know that the right tools and a little patience matter more than natural talent. Whether you’re taping off a checkerboard or rolling on a dark, moody green, taking your time with the prep work will save you a massive headache later. Don’t let the fear of messing up keep you from trying a new color. Paint is just paint. If you hate it, you can always prime over it and start again. Pin these wall decor painting ideas for your next weekend project, and let me know which color you end up choosing!
Frequently Asked Questions
What is the best paint finish for dark wall decor painting ideas?
Always use a flat or matte finish for dark, moody colors. Glossy finishes reflect light and will highlight every single drywall bump and roller mark, ruining the deep, saturated look you want.
Do I really need to use primer before painting?
Yes, especially if you’re painting a light color over a dark wall, or if you just patched holes with spackle. Primer stops the drywall from absorbing your expensive topcoat and ensures the final color looks even.
How do I get sharp lines when painting geometric wall shapes?
You need high-quality edge-sealing painter’s tape, like FrogTape. Press the edges down firmly with a plastic putty knife. Always peel the tape off while the paint is still slightly wet to prevent tearing.
What is color washing?
Color washing is a technique where you mix latex paint with a clear glaze and dab it onto the wall using a damp sea sponge. It creates a soft, mottled texture that resembles aged plaster.
