What’s Inside
- Embrace the Cocooning Effect with Color Drenching
- Install DIY Fluted Wall Paneling for Texture
- Craft a Statement Upholstered Headboard
- Layer Textures with Macramé and Statement Rugs
- Upgrade to Smart LED Strip Lighting
- Paint a Faux Headboard Directly on the Wall
- Upcycle Furniture with Paint and New Hardware
- Create a Wallpaper Box for Theatrical Impact
- Layer Your Lighting with Smart Outlets
- Prioritize Earthy and Muted Color Palettes
- Declutter Ruthlessly and Optimize Storage
- Choose the Right Bed Size for Your Space
- Add a Large Lumbar Pillow for Instant Luxury
- Install Picture Rail Molding for Flexible Art
- Incorporate Natural Elements and Greenery
- Build DIY Floating Wood Nightstands
I still remember staring at my walls last Tuesday night, surrounded by half-empty paint cans and cheap masking tape that wouldn’t stay put. My first attempt at DIY bedroom decor was a total disaster. I tried painting a geometric mural at 2 AM, and it ended up looking like a toddler’s finger-painting project. The lines bled everywhere, and the sharp, stinging chemical smell of cheap latex paint gave me a massive headache. If you’re staring at a boring room and feeling overwhelmed, I get it. I’ve been there. Let’s skip the trial and error. I’m going to walk you through what works right now for creating a cozy sanctuary, down to the exact nail sizes and paint brands I use. These are the real, tactile upgrades that actually look expensive. No flimsy cardboard hacks here. Trust me.
1. Embrace the Cocooning Effect with Color Drenching

A cocoon bedroom is all about painting your walls, trim, and ceiling in a single, rich hue. I tried this wrong for months before figuring it out. Last October, I slapped a bright teal on every surface of my guest room, and it felt like being trapped inside a giant toothpaste tube. It was visually exhausting. The secret is using muted, atmospheric shades. Right now, I’m obsessed with Valspar’s Warm Eucalyptus, which you can grab for $55.98 a gallon at Lowe’s. It’s a soothing gray-green that immediately lowers your blood pressure when you walk in. If you want something moodier, Dulux Heritage’s Dark Aubergine is stunning. Color drenching makes the space feel incredibly nurturing. Just don’t skip the primer. I skipped priming my baseboards once, and the paint chipped off the second my vacuum bumped it. Use a good angled brush for the corners, and commit to the ceiling. A stark white ceiling against dark walls ruins the cocoon illusion completely.
2. Install DIY Fluted Wall Paneling for Texture

Adding architectural interest doesn’t require hiring a carpenter. DIY fluted wall paneling is doable over a weekend. You’ll need reeded casing or primed MDF boards. I buy the 8-foot MDF boards at Home Depot for exactly $15.48 each. I installed these behind my bed last winter, and the room smelled like fresh sawdust and construction adhesive in the best way possible. The mistake most people make is eyeballing the gaps. Don’t do this. I ruined three boards by rushing and guessing the spacing. Use a laser level and a 1/2-inch wood spacer block to ensure perfect gaps between every single panel. Secure them with a brad nailer, then fill the tiny holes with DAP Plastic Wood filler. You can get a 4 oz tube at Walmart for $6.98. Once it’s painted, the shadows created by the fluted texture make the room look like a boutique hotel. It adds a heavy, expensive feel to the room that flat drywall just can’t compete with. Took me years to figure out that precision is everything.
3. Craft a Statement Upholstered Headboard

Oversized headboards are huge right now, but buying retail will drain your bank account. You can build a custom upholstered headboard for around $185 total. I built one for my sister last month, and the result is incredibly plush. We used a 1.5-meter wide MDF board from Costco’s hardware aisle. It cost around $22.99. We layered it with 2-inch high-density foam, which is $45.00 at Joann Fabric. The trick is wrapping the foam tightly in quilt batting before you add your fabric. I highly recommend a heavy-weight velvet or a thick linen. We used a mossy green cotton velvet that cost $14.99 per yard. I’ve learned the hard way that cheap, thin fabrics will show every single lump and staple underneath. Pull the fabric taut, but not so tight that the foam puckers. The satisfying thwack of a heavy-duty Arrow T50 staple gun ($21.97 at Target) securing the fabric is honestly therapeutic. It instantly grounds the bed and gives you a soft surface to lean against.

Dog Sculpture Home Decor Cute Man and Dog Statue Decoration
Dog Sculpture Home Decor Cute Man and Dog Statue Decoration for Office has been one of the most consistently praised picks in this category. 326 reviewers averaged 4.5/5.
4. Layer Textures with Macramé and Statement Rugs

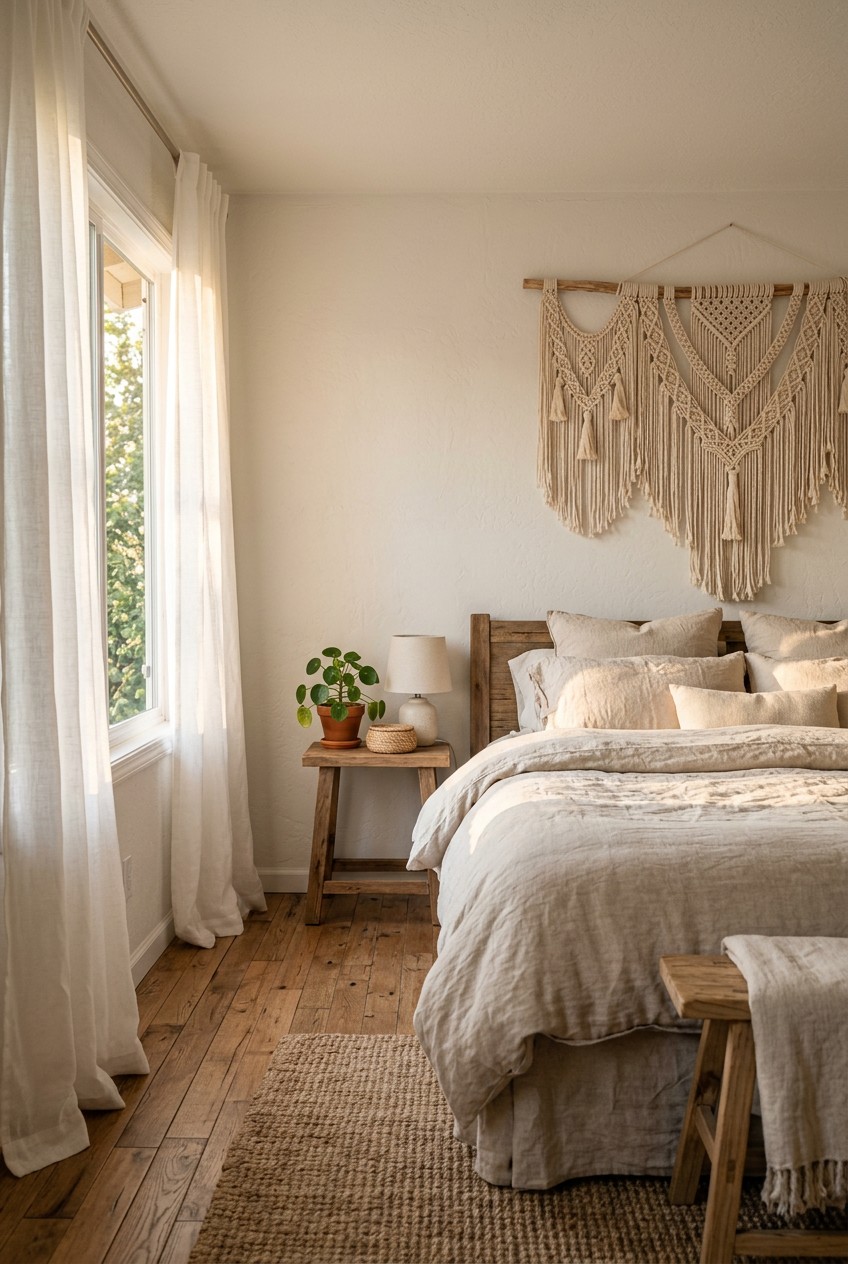
Texture does the heavy lifting in a cozy bedroom. Flat, shiny surfaces feel incredibly cold. I’m a huge advocate for layering thick, tactile elements. Hand-knotted macramé is making a sophisticated comeback, but not the dusty wall hangings from the seventies. Think oversized knots and multi-tone fibers draped casually over a reading chair. I found a gorgeous, thick cotton macramé throw at Target for $35.00, and it adds so much warmth. Anchor your space with an illustrated statement rug. A common mistake is buying a rug that’s too small. Your rug needs to extend at least two feet beyond the sides of your bed. I bought a tiny 4×6 rug from Kroger’s home section once because it was on sale for $40. It looked like a bathmat floating in the middle of my room. Upgrade to an 8×10 rug with abstract brush strokes. The soft, plush fibers under your bare feet first thing in the morning make getting out of bed significantly easier.
5. Upgrade to Smart LED Strip Lighting

Harsh overhead lighting is the absolute enemy of a relaxing bedroom. If you’re still relying on that single ceiling light, we need to talk. I recently discovered the magic of smart LED strip lighting, and it completely changed my nighttime routine. I use the Govee RGB LED light strips, which cost $35.99 for a 15-meter roll on Amazon. I stuck them directly behind my headboard and along the back edge of my floating shelves. You can control them from your phone and choose from over a hundred colors. I usually set mine to a dim, warm amber color around 8 PM. It mimics the glow of a fireplace. A quick warning. Don’t stick the adhesive strip directly onto cheap wallpaper. I did this in my apartment three years ago, and when I tried to adjust the lights, it ripped a massive chunk of paper off the wall. Always prep the surface with a little rubbing alcohol, and stick them to painted drywall or solid wood furniture instead. You might also like: 15 Lovely Cozy Home Decor Ideas to Steal Right Now
6. Paint a Faux Headboard Directly on the Wall

If you’re renting or just on a tight budget, painting a faux headboard is a brilliant DIY bedroom decor hack. You don’t need power tools, just a roll of FrogTape ($8.48 at Home Depot) and a quart of good interior paint. I painted a massive, terracotta-colored arch behind my bed last spring. I used Behr Premium Plus in the shade “Canyon Dusk” ($21.98 per quart). The visual impact is huge, but it takes up zero physical space. To get a perfect arch, I tied a piece of string to a pencil, pinned the other end to the center of the wall, and drew a massive half-circle. My first attempt was incredibly lopsided because I used a stretchy piece of yarn instead of rigid cotton string. Learn from my mistake. Use a stiff string, trace your line lightly, and use a small angled brush to cut in the edges before rolling the center. It frames the bed beautifully and feels incredibly intentional without the bulk of real furniture. You might also like: 15 Stunning Aesthetic Home Decor Ideas You Need to See

Lwenki Key Holder for Wall
Lwenki Key Holder for Wall has been one of the most consistently praised picks in this category. 84 reviewers averaged 4.5/5.
7. Upcycle Furniture with Paint and New Hardware

Don’t throw away that beat-up dresser just yet. Upcycling old furniture is my favorite way to get a custom look without spending hundreds of dollars. I had a boring, scratched-up IKEA MALM chest sitting in my corner for years. It looked cheap and depressing. Last weekend, I finally decided to tackle it. I sanded it down lightly and used Amy Howard LuxeLacquer in “Blue Lagoon” ($24.00 for a 12 oz can). The lacquer gives it a high-gloss, expensive finish that reflects light beautifully. The smell of the lacquer is pretty intense, so definitely do this in a well-ventilated garage, not your actual bedroom. I swapped out the non-existent pulls for solid brass knurled handles I found at Sprouts in their random seasonal home aisle for $4.99 each. The heavy, cold metal handles against the glossy blue paint completely disguised the fact that it’s a flat-pack piece of furniture. It looks exactly like a vintage find from a high-end boutique. You might also like: 20 Inspiring Cozy Cozy Living Room Home Decor Ideas Worth Trying This Year
8. Create a Wallpaper Box for Theatrical Impact

The wallpaper box is a massive trend right now, and it involves wrapping an entire room, including the ceiling, in a single pattern. If doing the whole room scares you, try creating a micro-box in an alcove or just extending an accent wall up onto the ceiling above your bed. I used a dark, moody floral peel-and-stick wallpaper from Tempaper ($42.50 per double roll). The vinyl texture feels slightly raised and luxurious. Applying wallpaper to a ceiling is an intense arm workout, and you absolutely can’t do it alone. I tried to apply a panel by myself last month, and the sticky sides folded over and glued themselves together. I lost an entire $40 sheet of paper in two seconds. Grab a friend, use a plastic smoother tool ($5.98 at Walmart) to push out the air bubbles, and work slowly. When it’s done, sitting in bed looking up at a canopy of dark florals feels incredibly dramatic and cozy.
9. Layer Your Lighting with Smart Outlets

Layered lighting is the secret sauce of interior design. You need a mix of task lighting, ambient lighting, and accent lighting. I refuse to use the main overhead light in my bedroom. Instead, I rely on a heavy brass floor lamp, two ceramic bedside lamps, and a string of warm fairy lights draped over my mirror. To make this setup effortless, I use Kasa Smart Wi-Fi Plugs ($22.99 for a 4-pack at Target). I plugged all my lamps into these smart outlets and synced them to my Amazon Echo. Now, I just say “Alexa, turn on bedtime mode,” and the room is bathed in a soft, warm glow. The clicking sound of the smart plugs engaging all at once is weirdly satisfying. Don’t make the mistake of buying bulbs with different color temperatures. I once had a harsh blue-white bulb in my floor lamp and a warm yellow bulb on my nightstand. It made the room feel like a sterile waiting room clashing with a cozy cabin. Stick to 2700K bulbs everywhere.

UTTCMK Bookshelf Decor Thinker Statue
UTTCMK Bookshelf Decor Thinker Statue – Abstract Art Reading Thinker S punches above its price — 771 buyers rated it 4.5 stars. I would buy it again.
10. Prioritize Earthy and Muted Color Palettes

Cool, icy grays are officially out. They make bedrooms feel like corporate offices. We’re moving towards earthy, nature-inspired hues that actually make you want to curl up and sleep. I recently repainted my primary bedroom in Benjamin Moore’s Silhouette AF-655 ($69.99 a gallon). It’s this luxurious burnt umber with charcoal notes that looks different depending on the time of day. In the morning, it’s a warm clay, and at night, it’s a deep, rich shadow. If that’s too dark for you, Sherwin Williams’ Universal Khaki is a gorgeous, grounding beige that doesn’t pull yellow. Honestly, I used to paint everything bright white thinking it would make my room look bigger. It didn’t. It just made my bedroom look unfinished and cold. Embracing deeper, muted tones instantly adds character. The matte finish of a high-quality paint absorbs the light, softening the harsh edges of the room and creating a genuinely restorative space.
11. Declutter Ruthlessly and Optimize Storage

You can’t have a relaxing bedroom if you’re staring at piles of laundry and overflowing nightstands. Expert Emma Deterding is absolutely right when she says “less really is more.” I used to keep stacks of unread books, half-empty water glasses, and random mail on my dresser. It gave me low-level anxiety every time I walked in. I finally bought a set of rolling under-bed storage drawers from The Container Store ($39.99 each). They are made of sturdy wire mesh and glide smoothly on the carpet. I shoved all my out-of-season clothes and extra blankets under there. The visual relief of a clear floor is massive. A huge mistake is buying nightstands without drawers. I bought these trendy, minimalist wire side tables from Whole Foods’ home section once. They looked cool, but they exposed all my messy cords, lip balms, and random junk. Always buy closed storage for the bedroom. You need a place to hide the ugly, necessary things.
12. Choose the Right Bed Size for Your Space

Shoving a massive California King bed into a tiny 10×10 room is a rookie mistake. I know this because I did it. Five years ago, I bought a colossal upholstered sleigh bed off Craigslist for $200. I had to squeeze past the footboard sideways every morning just to reach my closet. I snagged my sweaters on the corners constantly. Bed expert Jonathan Warren recommends leaving a minimum of 24 inches of clearance around the sides and foot of your bed. I finally downsized to a sleek, low-profile Queen bed frame from Zinus ($145.00 on Amazon), and my room instantly felt twice as large. The flow of the room completely changed. If you have a compact space, skip the bulky footboards entirely. A simple platform bed with crisp, white linen sheets ($89.99 at Target) keeps the visual weight low to the ground, allowing your eyes to travel freely across the room.
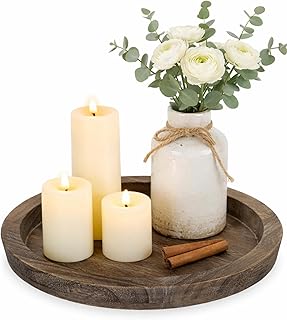
Hanobe Candle Plate Holder Tray: Round Wood Decorative
A dependable everyday pick — Hanobe Candle Plate Holder Tray: Round Wood Decorative Candle Plate – pulls in 26 ratings at 4.5 stars. Not flashy, just solid.
13. Add a Large Lumbar Pillow for Instant Luxury

I’m officially over the trend of putting fifteen tiny throw pillows on a bed. It takes ten minutes to make the bed in the morning, and the pillows just end up on the floor collecting dust and dog hair anyway. The ultimate styling trick is using one single, massive lumbar pillow. I bought a 14×36 inch heavy velvet lumbar pillow cover from West Elm for $49.00 and stuffed it with a plush down-alternative insert ($22.00 at Joann Fabric). You just prop your two sleeping pillows up, place the long lumbar pillow in front, and you’re done. The bed looks perfectly styled and high-end in five seconds. I chose a deep rust color, and the soft, crushed texture of the velvet catches the light beautifully. Don’t buy cheap, lumpy inserts. I bought a $5 poly-fill insert from Walmart once, and it flattened out into a sad, rigid pancake within a week. Spend the extra money on a good insert.
14. Install Picture Rail Molding for Flexible Art

I love rotating my art, but my bedroom walls used to look like Swiss cheese from all the nail holes. Installing picture rail molding is a brilliant, vintage-inspired solution. You install a strip of wooden picture rail molding ($12.98 for an 8-foot piece at Lowe’s) about 12 inches below your ceiling. Then, you use brass picture rail hooks ($14.99 for a pack of 10 on Amazon) and clear nylon cords to hang your frames. I spent a Saturday afternoon cutting the trim with a miter saw and nailing it up. The smell of the raw pine wood was amazing. Now, I can slide my artwork left or right, or adjust the height, without picking up a hammer. It also creates a beautiful visual break on the wall, making standard 8-foot ceilings look significantly taller. Just make sure you anchor the molding into the studs. I missed a stud on my first try, hung a heavy mirror, and ripped the trim straight out of the drywall. No exaggeration.
15. Incorporate Natural Elements and Greenery

A bedroom without natural elements feels sterile. You need a touch of life to soften the hard edges of your furniture. I keep a cluster of small Haworthia succulents in textured concrete pots ($12.99 each at Trader Joe’s) on my windowsill. The rough, porous concrete against the spiky, dark green leaves adds perfect visual contrast. If you have the wall space, a DIY vertical garden is incredible. I built a small wooden frame, stapled chicken wire across the back, and stuffed it with preserved reindeer moss ($18.50 a box at Michaels). It requires zero watering and adds a vibrant, spongey texture to the wall. Don’t buy fake, plastic ivy vines and string them across your ceiling. I tried that in college, and it just collects a thick layer of gray dust that’s impossible to clean. Stick to real, low-maintenance plants or high-quality preserved moss. The earthy smell of the moss immediately grounds the room and makes it feel fresh.

GODONLIF Candle Warmer Lamp with Timer Dimmable
GODONLIF Candle Warmer Lamp with Timer Dimmable has been one of the most consistently praised picks in this category. 75 reviewers averaged 4.5/5.
16. Build DIY Floating Wood Nightstands

Heavy, chunky nightstands can make a small bedroom feel incredibly cramped. I solved this by building my own floating wood nightstands last summer. I went to Home Depot and bought a 2×12 inch piece of common pine board for $16.98. I had them cut it into two 18-inch sections right there in the store. I sanded them down until they were buttery smooth and stained them with Minwax Dark Walnut ($11.48 a half-pint). The rich, oily smell of the wood stain still reminds me of that project. I mounted them directly to the wall studs using heavy-duty black steel L-brackets ($8.99 for a pair). They hover about 24 inches off the floor, leaving plenty of room underneath for my slippers or a small woven basket. The biggest mistake you can make here is using drywall anchors instead of finding the stud. I learned this when my cat jumped onto a floating shelf secured only by drywall anchors, and the whole thing ripped out of the wall, taking my favorite ceramic mug with it. Always find the stud.
I’m so glad you’re ready to tackle your bedroom refresh. Don’t feel like you have to do all sixteen of these projects this weekend. Pick one that excites you, grab your supplies, and start small. I’d highly recommend starting with the lighting or a fresh coat of paint. Those two things make the biggest impact for the least amount of money. Save this post, pin it to your favorite decor board, and tag me when you finish your room. I can’t wait to see what you create.
Frequently Asked Questions
What is the cheapest way to start diy bedroom decor?
Paint is your best friend. Painting a faux headboard arch directly on your wall or color drenching the room in a warm, earthy tone provides massive visual impact for under $60.
How do I make my diy bedroom decor look expensive?
Focus on heavy, layered textures. Swap cheap plastic hardware for solid brass pulls, use thick velvet for upholstery projects, and install architectural details like fluted MDF wall paneling.
Is smart lighting worth it for a bedroom?
Absolutely. Swapping harsh overhead lights for smart LED strips and Wi-Fi plugs allows you to layer your lighting. You can create a warm, dim ambiance that mimics a fireplace instantly.
How do I decorate a small bedroom without cluttering it?
Ditch the bulky furniture. Build floating wood nightstands mounted to the wall studs, use under-bed storage drawers, and stick to one large lumbar pillow instead of multiple small throw pillows.
